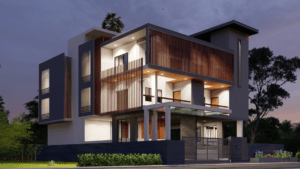
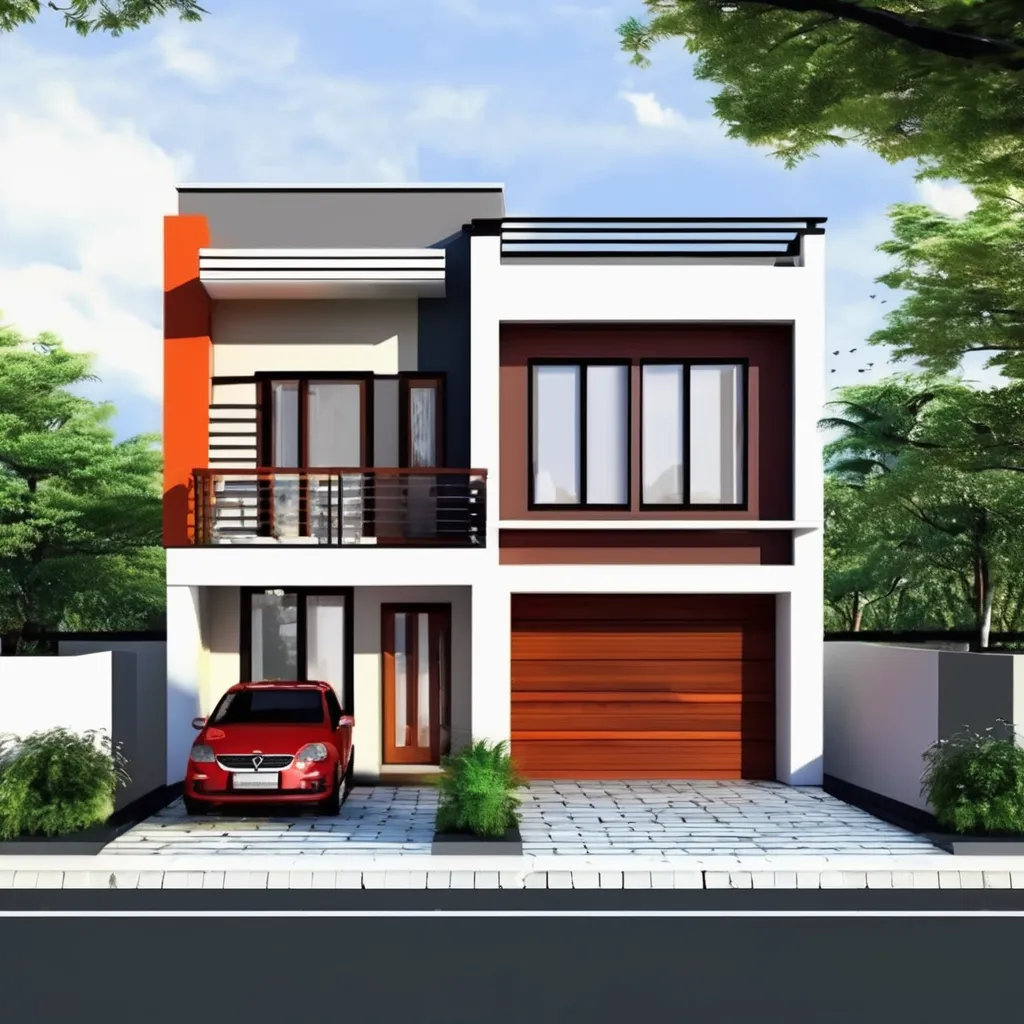
Small houses can have stunning modern front elevations, even with limited frontage. The perfect design for your home depends on several key factors: plot size, number of floors, parking requirements, your floor plan, budget, and preferred architectural style. At SmartScale House Design, we’ve curated a comprehensive visual hub to help you explore and discover the ideal front elevation for your compact home.
Our page showcases actual and representative designs tailored to a variety of small-house configurations, all aimed at helping you visualize your dream home before construction begins. Let’s explore the possibilities.
25+ Front Elevation Designs for Small Houses
Below, we’ve categorized a wide array of front elevation designs by plot size, architectural style, and configuration. This makes it easier to find inspiration that aligns with your specific plot and vision.
1. Modern 20×40 Small House Front Elevation
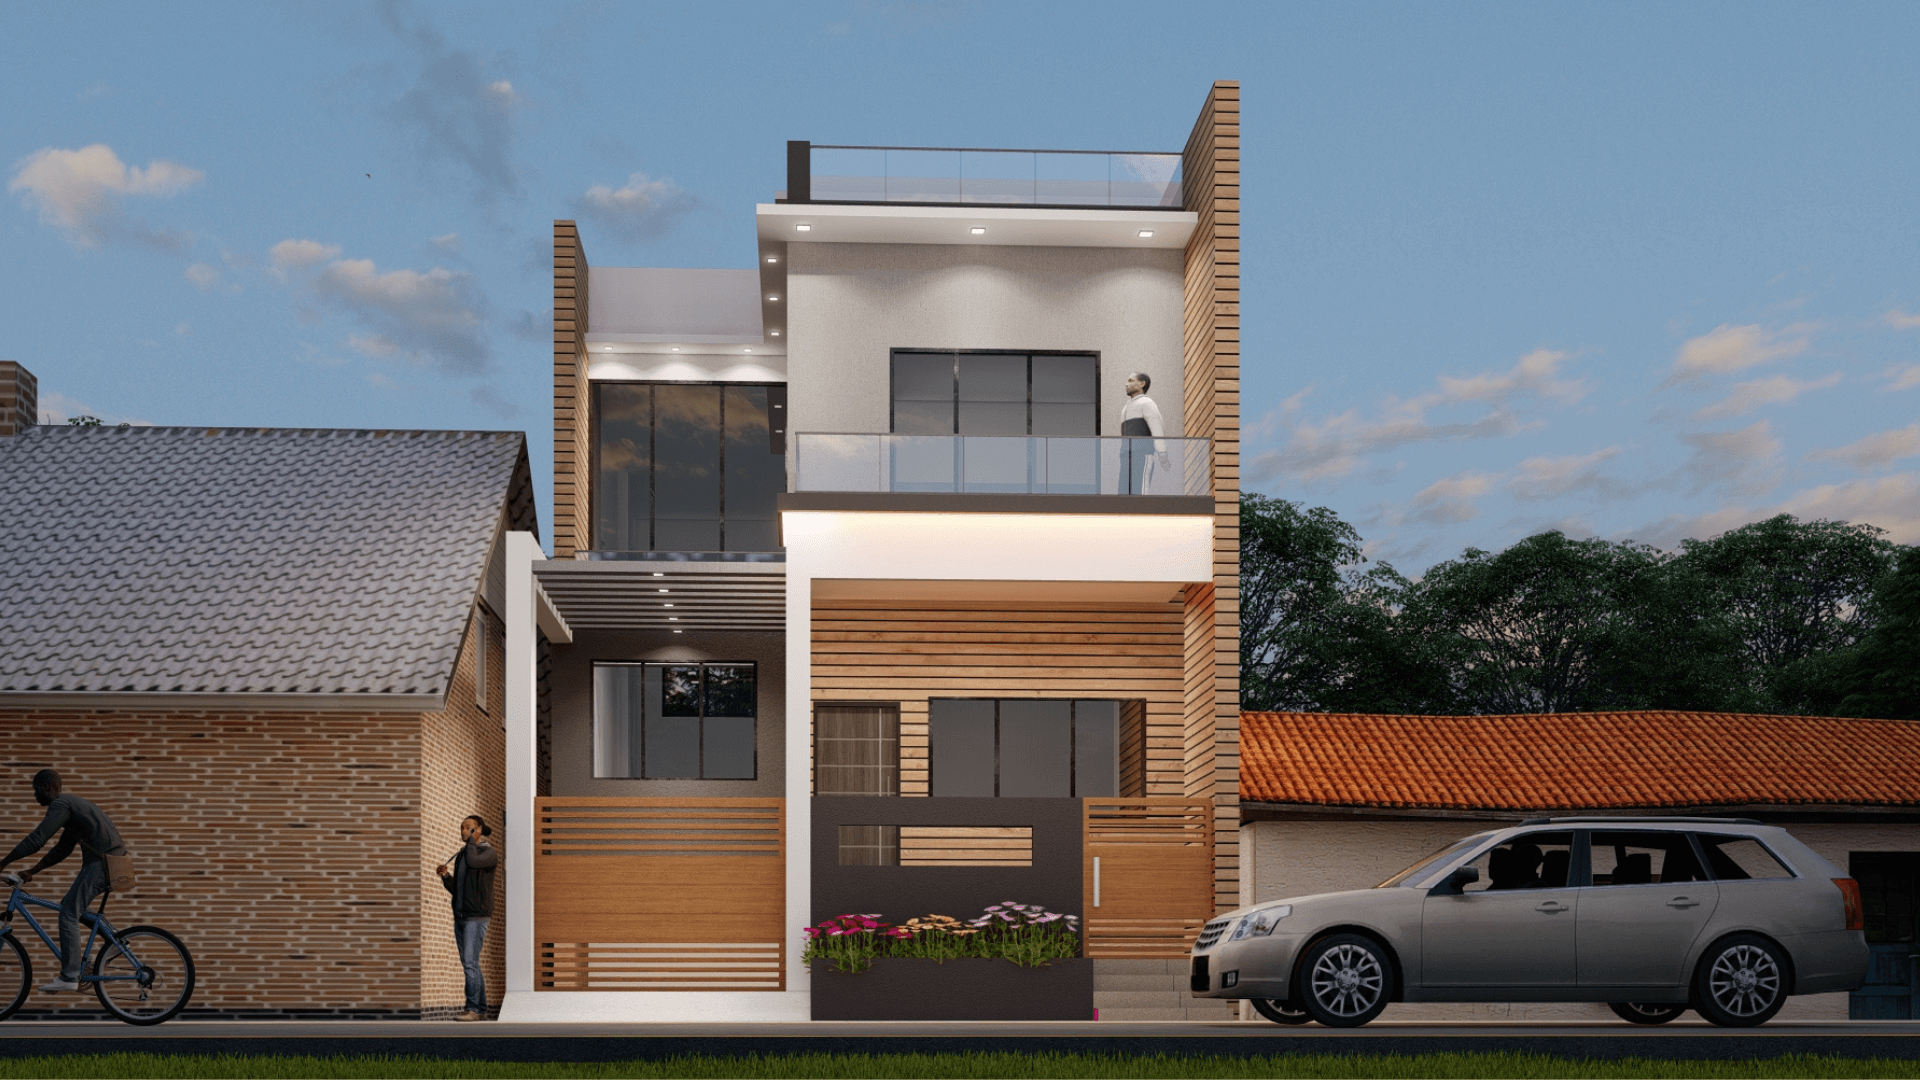
A perfect example of a modern design for a standard 20×40 plot. This design emphasizes clean lines and a balanced façade.
Plot size: 20×40 feet (800 sq ft total area)
House type: Modern Single-Family
Floors: G+1 (Ground + First Floor)
Style: Modern Minimalist
Key Façade Features:
-
Entrance offset: The main door is positioned 4 ft from the left edge, creating a balanced composition
-
Window placement: Three large windows on the ground floor (each 4 ft wide × 5 ft tall) and four windows on the first floor
-
Balcony projection: The first-floor balcony extends 4 ft outward, creating a covered porch below
-
Roof overhang: A 2-ft deep horizontal canopy above the entrance adds visual weight
-
Vertical grooves: Two vertical accent lines (6 inches wide) run from ground to roofline, breaking the horizontal mass
Recommended Materials:
-
Primary finish: Textured exterior paint in warm grey (Simpson Paint – “Urban Grey”)
-
Accent material: Local Kota stone cladding on the entrance pillar and balcony base (₹180–₹250/sq ft)
-
Main door: Teak wood frame with glass inserts (₹45,000–₹60,000)
-
Window frames: UPVC in matte black (₹450–₹600/sq ft)
-
Balcony railing: Stainless steel with glass panels (₹2,800–₹3,500/running ft)
Suitable Homeowner:
A young family or working professional seeking a stylish, low-maintenance, and contemporary home. This design works well for budgets between ₹18–₹25 lakhs for the exterior finish alone.
Why This Design Works:
-
The 4-ft balcony projection serves dual purpose: it provides shade to the ground floor windows (reducing heat gain by 15–20%) and creates visual depth
-
The vertical groove lines make the 20-ft frontage appear taller than it actually is
-
The grey-toned palette hides dust well, reducing maintenance frequency
-
Window alignment (windows on first floor directly above ground floor windows) simplifies structural design
2. 20×40 North-Facing Front Elevation
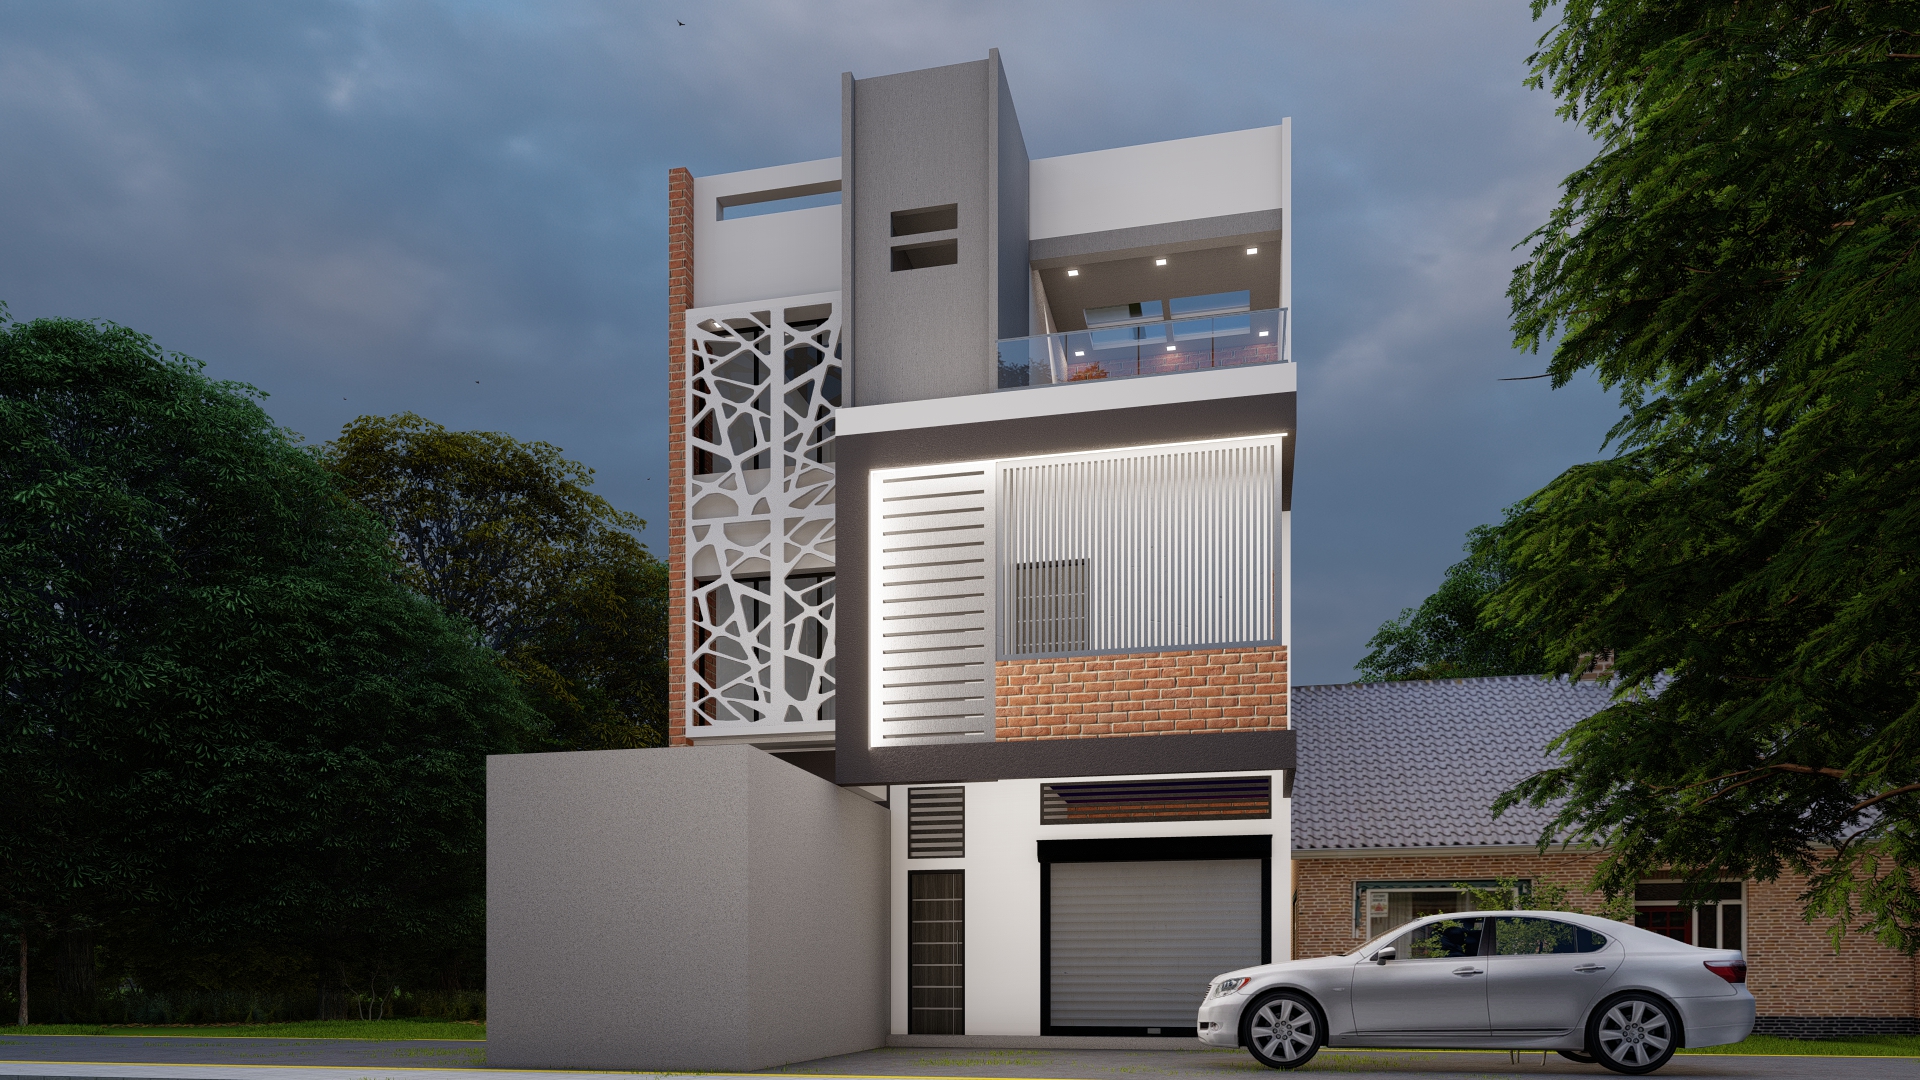
Designing for a north-facing plot requires careful thought about the entrance and natural light. Since the sun never directly hits the north face, the challenge is ensuring adequate daylight inside.
Key Design Decisions:
-
Entrance placement: The main door is positioned centrally to create a welcoming focal point, unlike south-facing homes where the entrance is often offset
-
Window size: North-facing windows are deliberately larger (5 ft wide × 6 ft tall) to compensate for lower light levels
-
Glass-to-wall ratio: 40% glass on the ground floor and 35% on the first floor – higher than typical for other orientations
-
Colour palette: Light colours are essential – we recommend a base of warm white (Asian Paints “Ivory White”) with a charcoal grey accent wall to create contrast
-
Canopy design: A translucent polycarbonate canopy above the entrance (3 ft deep) allows diffused light to enter the foyer while providing rain protection
Façade Composition:
| Element | Specification |
|---|---|
| Main door | 4 ft wide × 7 ft tall, wooden frame with frosted glass |
| Side windows | Two windows, each 3 ft × 5 ft, on either side of the door |
| First floor | Continuous balcony with glass railing, 14 ft wide |
| Vertical element | A single stone-clad pillar on the right side |
Material Costs (North-Facing Specific):
-
Light-coloured exterior paint: ₹28–₹35/sq ft (requires more frequent cleaning)
-
Frosted glass for entrance: ₹120–₹180/sq ft
-
Polycarbonate canopy: ₹350–₹500/sq ft
3. 20×40 West-Facing Front Elevation
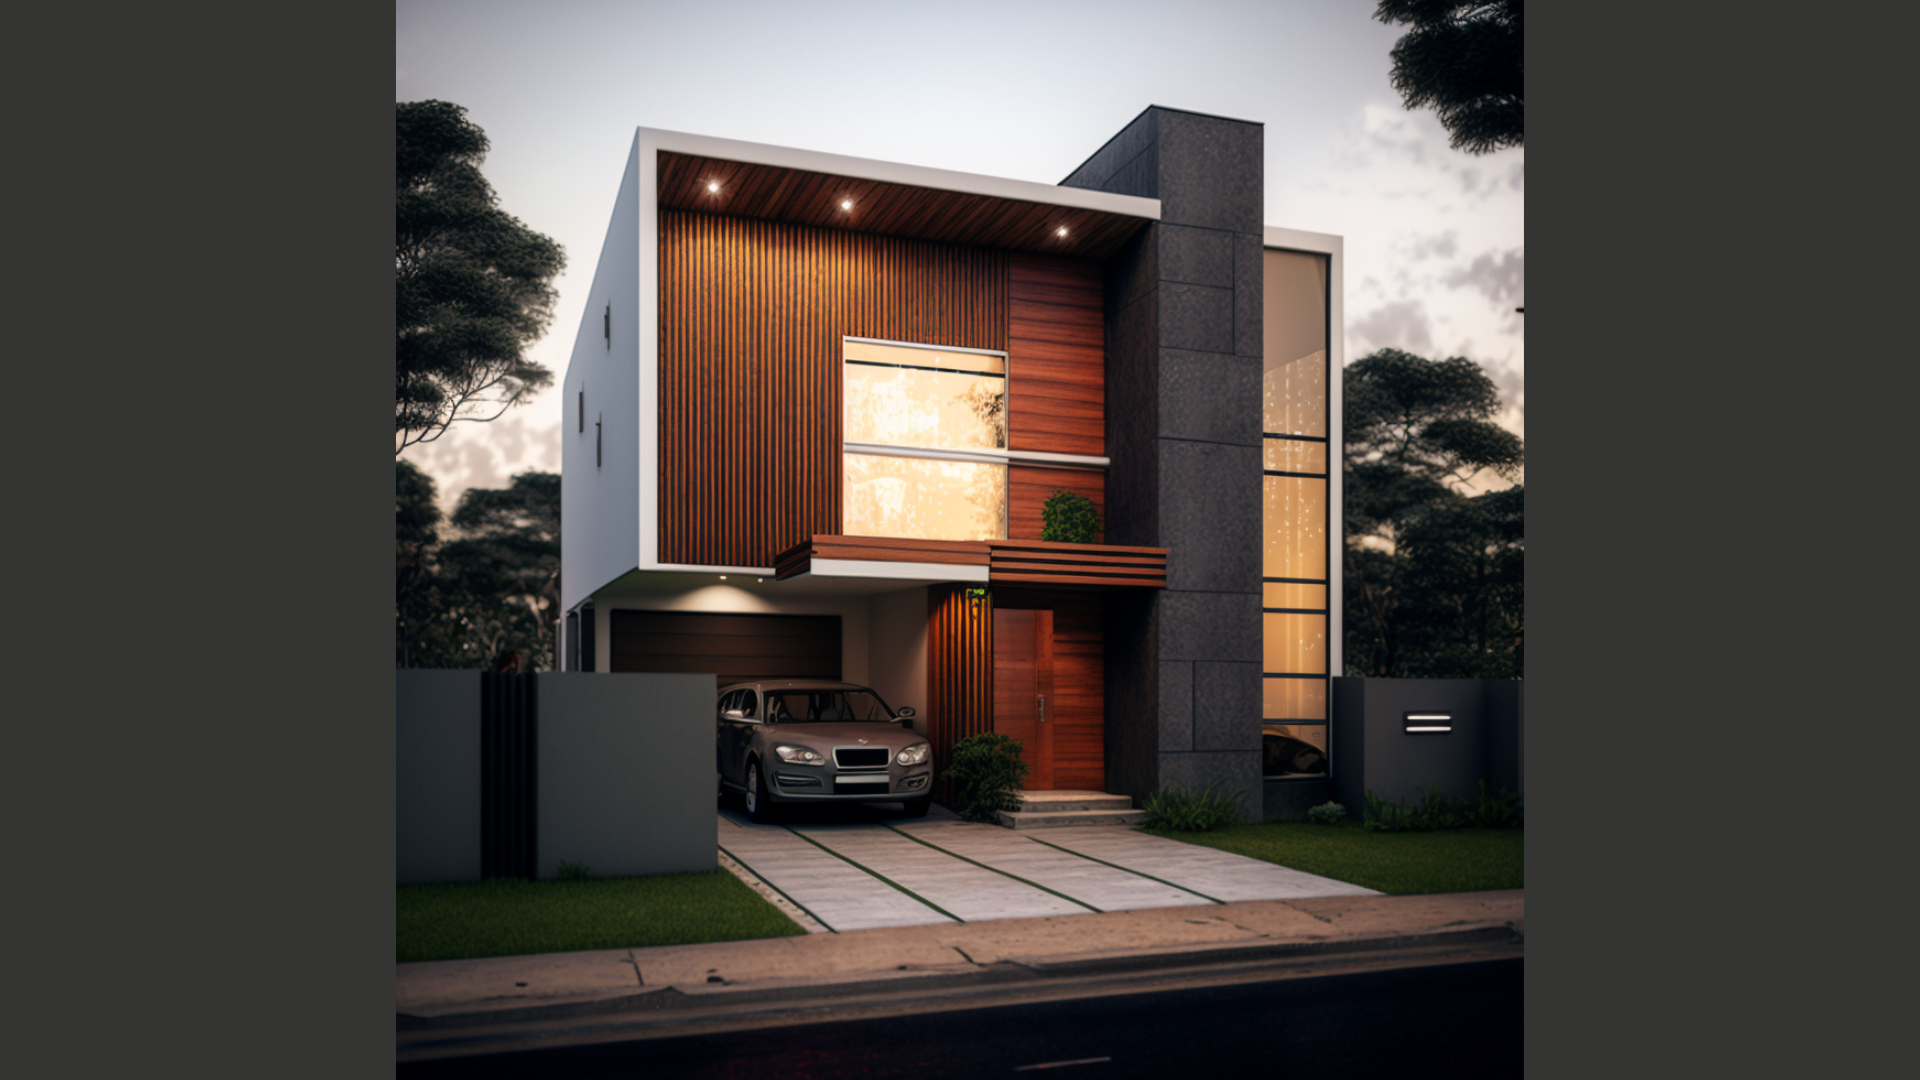
West-facing elevations need thoughtful treatment to manage heat. The afternoon sun hits the west face directly, which can make rooms uncomfortably hot.
Heat Management Features:
-
Shading elements: Horizontal louvers (4 inches deep) are installed above all west-facing windows, blocking 60–70% of direct sunlight while allowing diffused light
-
Window placement: Smaller windows on the west face – 3.5 ft × 4.5 ft instead of the standard 4×5 – to reduce heat ingress
-
Material selection: Light-coloured exterior paint (cream or beige) reflects sunlight rather than absorbing heat. Dark colours can increase surface temperature by 15–20°F
-
Entrance treatment: The main door is recessed 3 ft into the wall, creating a shaded transition zone
-
Ventilation: A vertical vent strip (1 ft wide) near the roofline allows hot air to escape
Façade Treatment:
-
Base: Warm beige textured plaster
-
Accent wall: Terracotta-coloured paint (only on one pillar)
-
Louvers: Powder-coated aluminium in dark bronze finish
-
Main door: Solid wood with small glass panels to minimize heat gain
Cost Implications:
-
Aluminium louvers: ₹1,200–₹1,800/sq ft
-
Heat-reflective paint: ₹45–₹60/sq ft (standard paint is ₹25–₹35/sq ft)
-
Additional cost for west-facing design: ₹40,000–₹60,000 extra compared to east-facing
4. 20×40 G+1 Front Elevation (Detailed)
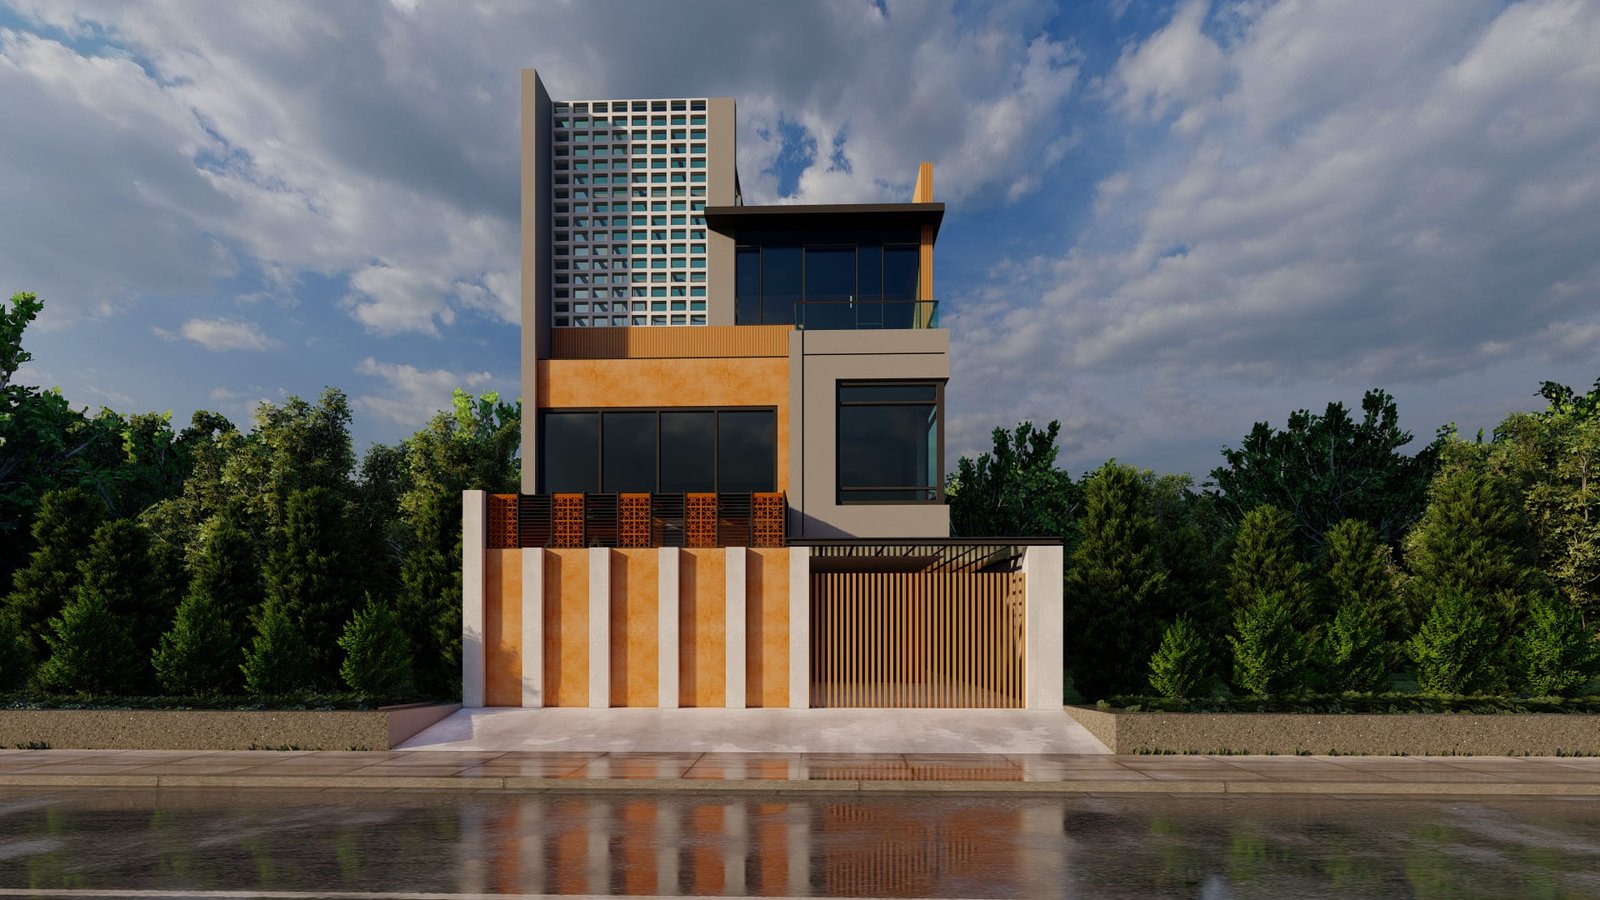
A ground-plus-one configuration on a 20×40 plot requires careful management of vertical space.
Floor-by-Floor Breakdown:
| Floor | Height | Features |
|---|---|---|
| Ground | 10 ft | Parking (1 car), living room, kitchen, dining |
| First | 9.5 ft | 2 bedrooms, balcony |
| Roof | – | Terrace access with parapet wall |
Critical Design Elements:
-
First-floor projection: The first floor extends 3 ft beyond the ground floor on the front side. This creates a covered parking space below without adding extra columns
-
Balcony design: 14 ft wide × 4 ft deep. The balcony is positioned above the parking area, providing shade to the parked vehicle
-
Vertical elements: Two RCC columns (9 inches × 9 inches) on the ground floor support the first-floor projection. These are clad with wood-finish tiles to add warmth
-
Ground-floor parking: The parking bay is 10 ft wide × 18 ft deep – sufficient for a standard sedan. The garage door is a rolling shutter (₹18,000–₹25,000) painted to match the wall colour
-
Window alignment: All first-floor windows are directly above ground-floor windows. This alignment:
-
Simplifies plumbing and electrical runs
-
Creates a clean vertical rhythm
-
Reduces structural complexity
-
Structural Considerations:
-
The 3-ft projection requires an RCC cantilever slab with reinforcement of 12mm bars at 6-inch centres
-
Column size increases from 9″×9″ to 9″×12″ to support the additional load
-
Estimated structural cost premium: ₹1.2–₹1.5 lakhs compared to a non-projected design
Material Specifications:
-
Exterior: Smooth plaster with weatherproof primer + two coats of acrylic paint
-
Balcony railing: Glass panels with stainless steel posts (₹2,800/running ft)
-
Floor finish on balcony: Anti-skid ceramic tiles (₹65/sq ft)
5. 20×40 Row House Front Elevation

Row houses share walls with neighbors on both sides, leaving only the front and rear facades visible. With a typical 20-ft frontage, making the house stand out requires strategic design.
Challenges with Row Houses:
-
No side windows – all light comes from the front and rear
-
Limited visual space – the house is literally sandwiched between others
-
Often subject to local by-laws that restrict height and projection
Design Strategy for Narrow Frontage:
-
Vertical emphasis: Every design element should draw the eye upward. We use:
-
Vertical grooves or flutes (4 inches wide, spaced 3 ft apart)
-
Tall, narrow windows (3 ft wide × 6 ft tall) instead of wide ones
-
A vertical accent strip of different material or colour
-
An upward-tapering canopy above the entrance
-
-
Colour contrast: Use a light base colour with a dark vertical accent. The contrast helps define the house’s boundaries
-
Entrance as focal point: The entrance should be the most visually interesting part. We achieve this with:
-
A framed entrance (wood or stone surround)
-
Decorative wall-mounted lights on either side
-
A clear address number plaque
-
-
Balcony as a defining feature: Even a small balcony (4 ft deep × 8 ft wide) creates visual depth that helps the house stand out from neighbours with flat facades
Pro Tip: If your row house has a 20-ft frontage, aim for a height-to-width ratio of at least 1.5:1. This means an 18–20 ft height on a 20-ft width creates a pleasing vertical emphasis.
6. Modern 20×50 Front Elevation
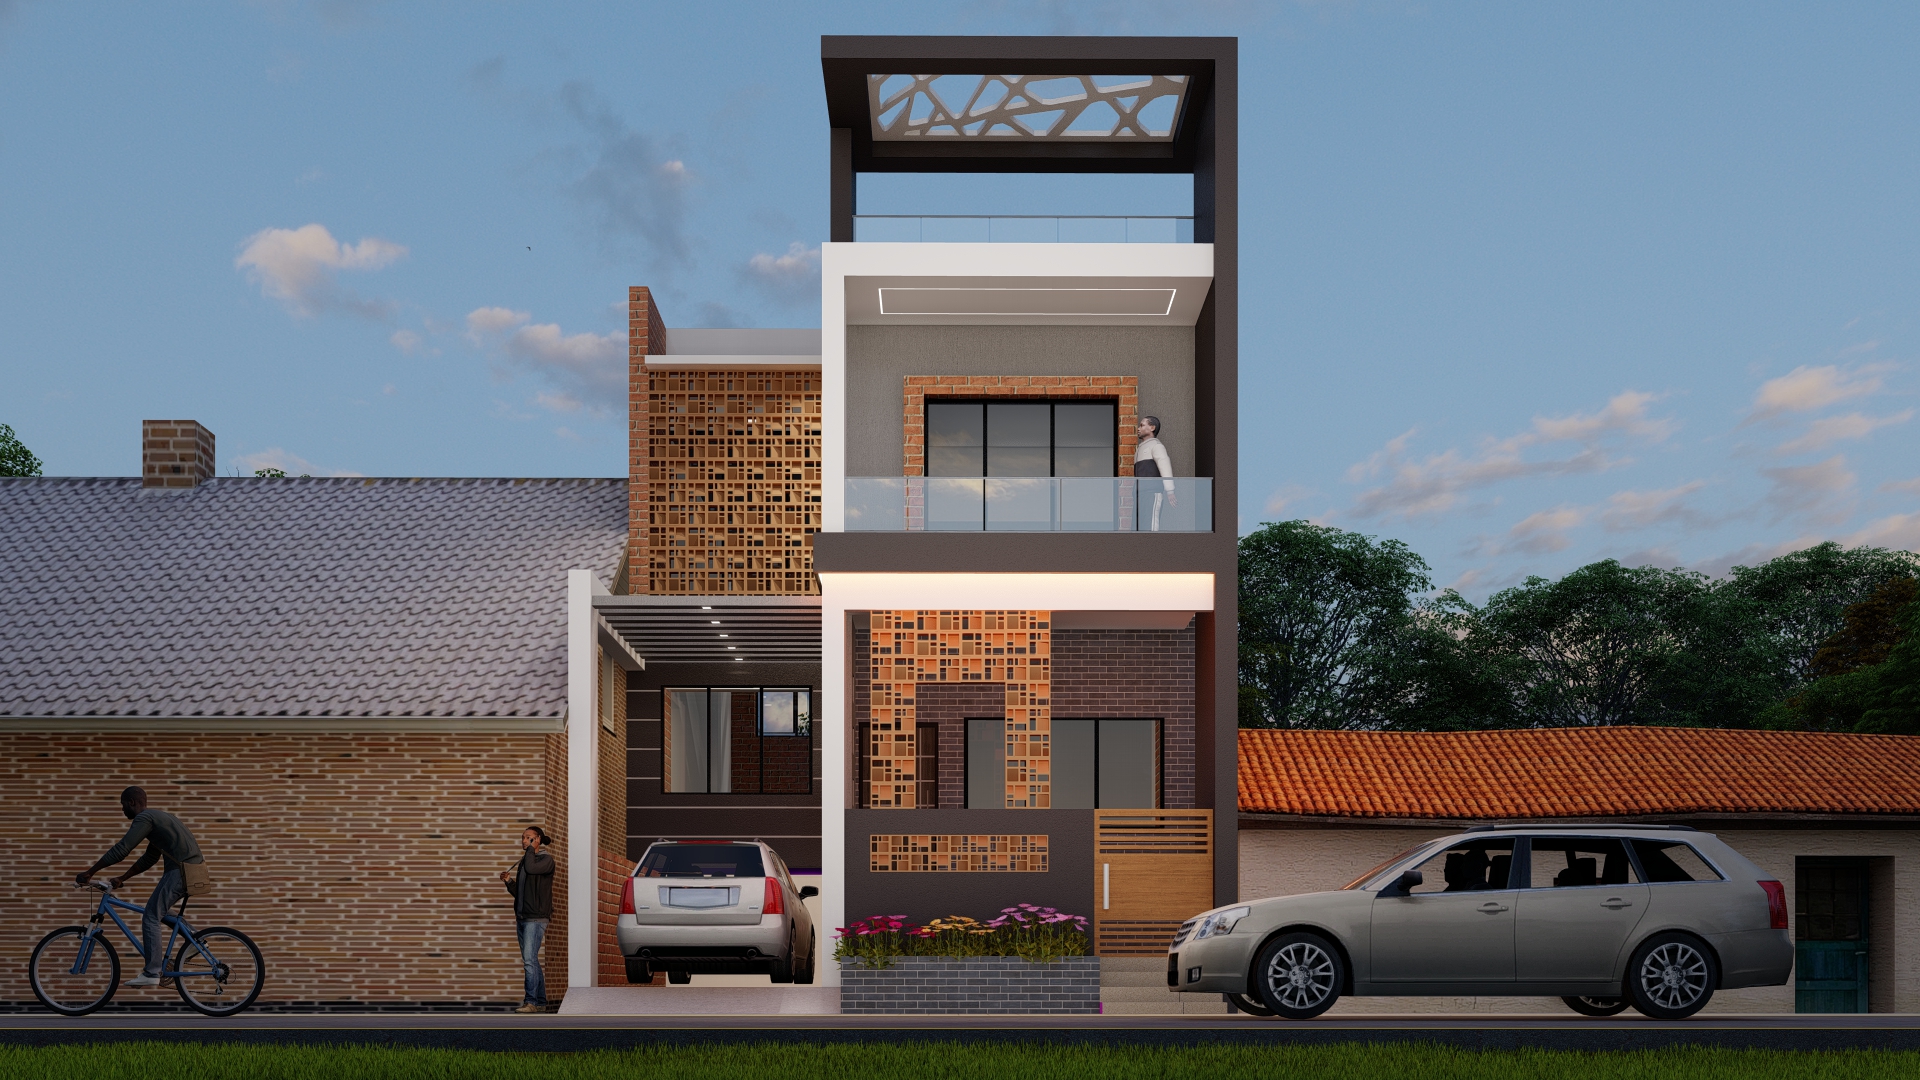
With a 20-ft frontage and 50-ft depth, the challenge is managing the long, narrow shape.
Design Focus:
-
Vertical lines: Use continuous vertical lines from ground to roof to break up the 50-ft length and emphasize height
-
Zoning: Divide the 20-ft width into three visual zones:
-
Left zone (6 ft): Entrance and living room windows
-
Centre zone (8 ft): Main visual mass with balcony above
-
Right zone (6 ft): Car parking
-
-
Parking treatment: The parking bay is set back 4 ft from the main wall, creating a 4-ft deep porch area. This adds depth and makes the parking less dominant
-
Window placement: Large windows on the ground floor (4 ft × 5 ft) bring light into the living and dining areas. First-floor windows are slightly smaller (3.5 ft × 4.5 ft) for bedrooms
7. 20×50 G+1 Front Elevation With Balcony
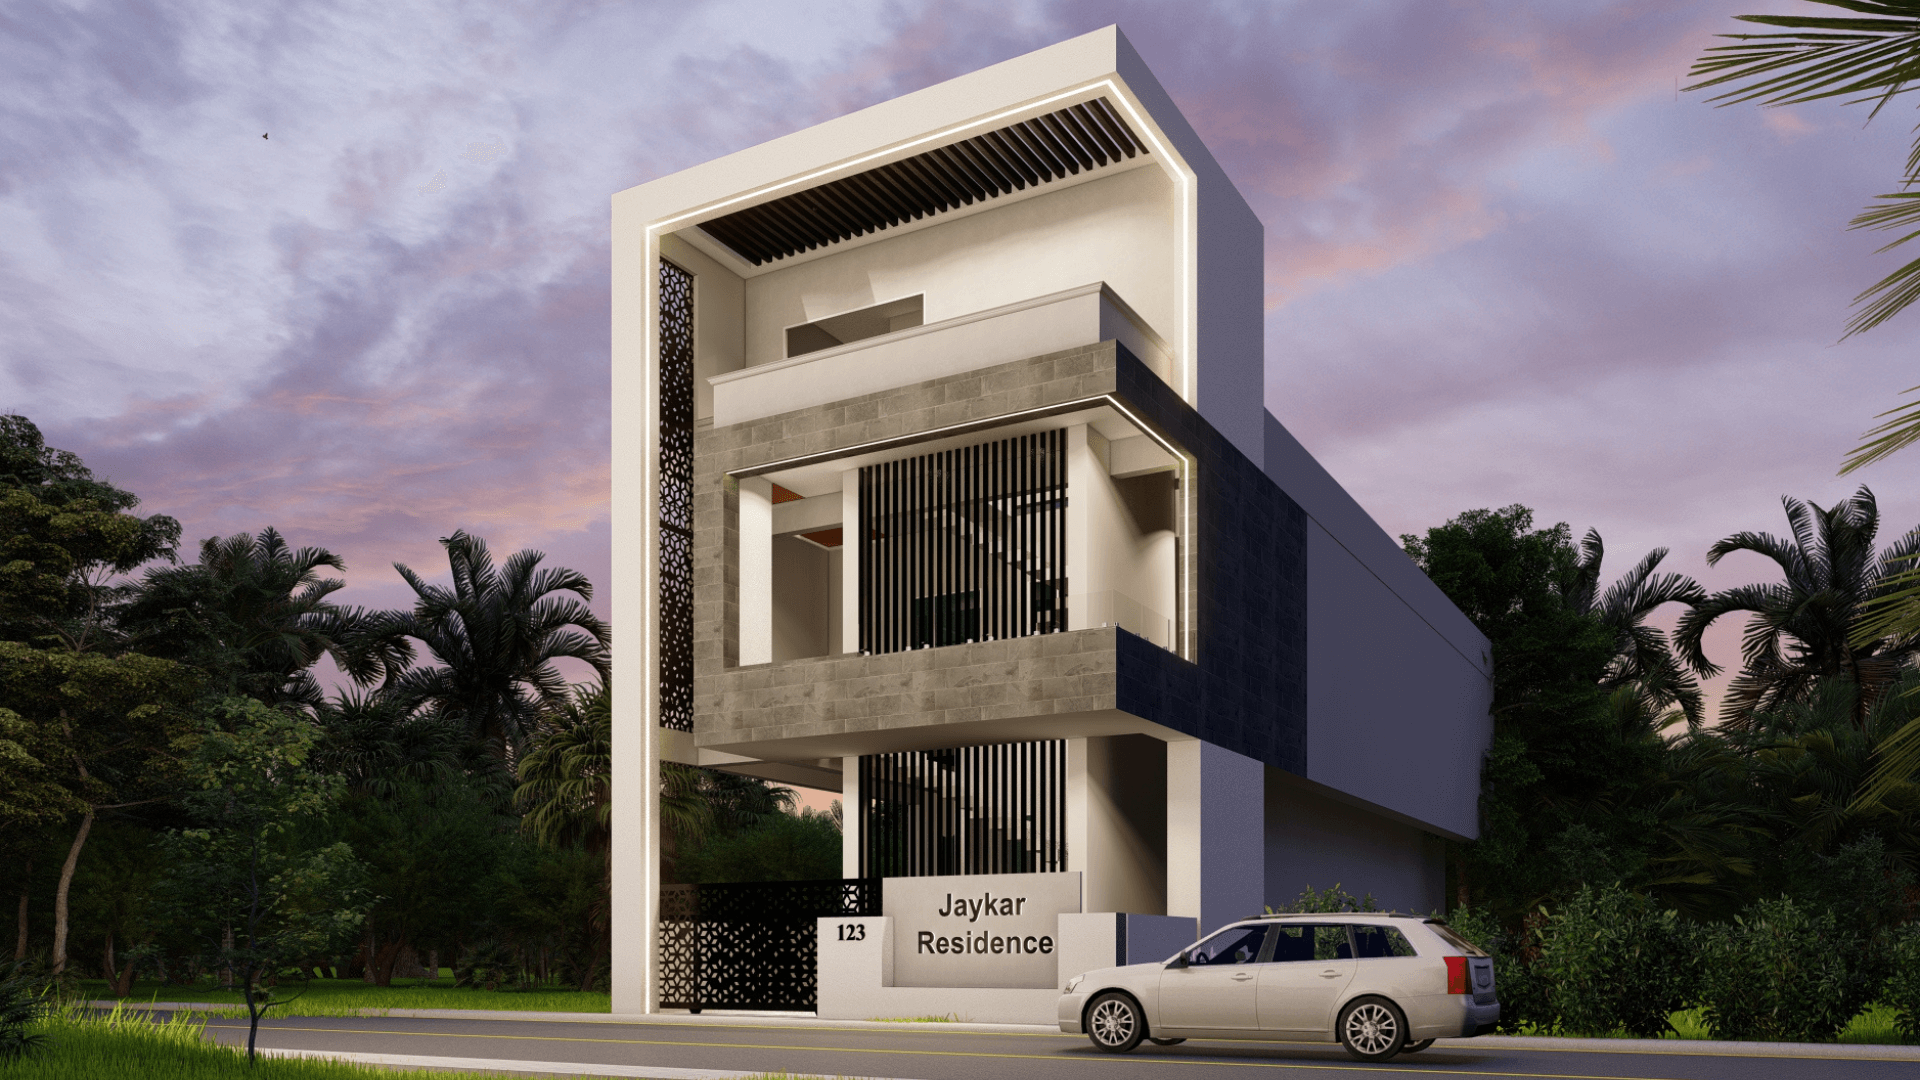
This design adds a premium feel with a thoughtfully integrated balcony.
Balcony Specifications:
-
Size: 12 ft wide × 5 ft deep
-
Material: Glass railings with wood-finish handrail
-
Projection: 4 ft beyond the ground floor line
-
Purpose: Creates a shaded seating area below, provides outdoor space for the first-floor residents
Façade Projections:
-
Balcony: Projects 4 ft. Supported by an RCC cantilever slab
-
Entrance canopy: Projects 3 ft. Supported by a single pillar on the left side
-
Window sills: All windows have a 6-inch projected sill. This small detail adds depth and interest to the otherwise flat wall
Wood Finish Elements:
-
The entrance door and balcony handrail are wood-finish laminates
-
We recommend using a high-grade laminate (₹400–₹600/sq ft) that withstands sunlight and rain, rather than natural wood which requires frequent maintenance
Parking Integration:
-
The 4-ft balcony projection creates a covered parking area 14 ft wide × 18 ft deep
-
This is an 18% increase in covered area compared to a design without projection
Construction Costs for This Design:
| Element | Cost Estimate |
|---|---|
| Balcony structure (RCC) | ₹55,000–₹70,000 |
| Glass railing | ₹35,000–₹45,000 |
| Entrance canopy | ₹18,000–₹25,000 |
| Wood-finish door + accents | ₹65,000–₹85,000 |
| Total exterior finishes | ₹1.7–₹2.3 lakhs |
8. 20×50 Front Elevation With Car Parking
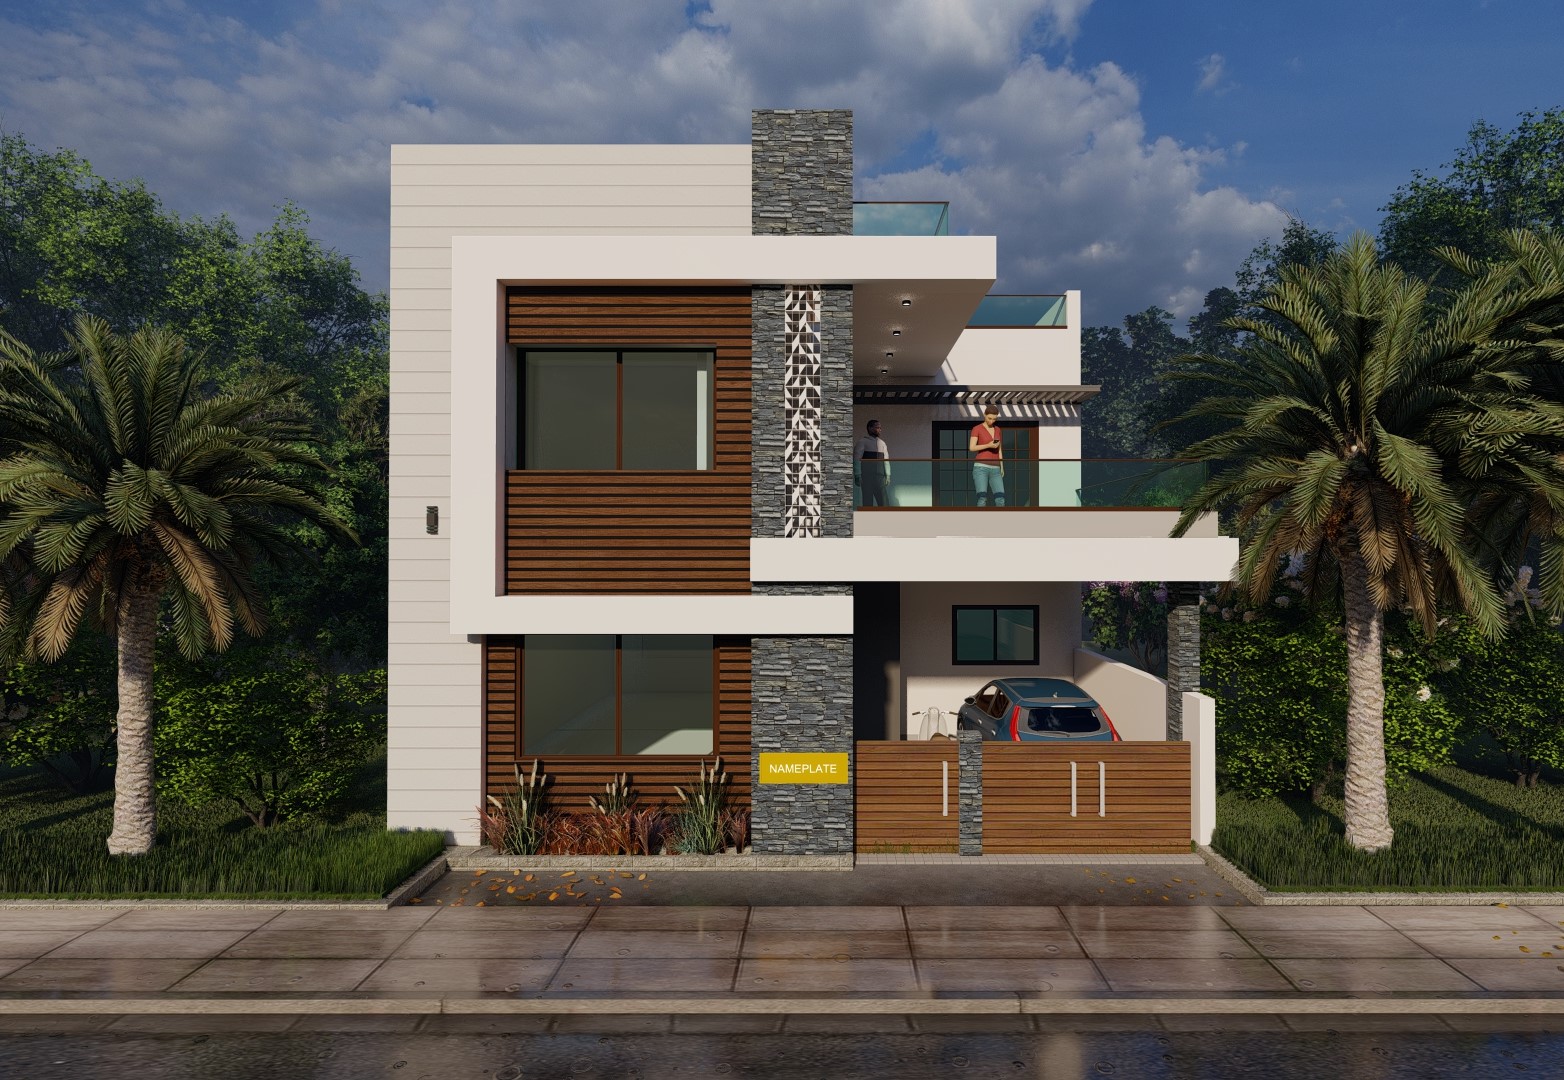
Parking integration is a major concern. Here’s how to do it right.
Parking Options for 20×50 Plots:
| Option | Description | Pros | Cons | Best For |
|---|---|---|---|---|
| Open parking | Car parked in the front setback, no roof | Lowest cost (₹15,000–₹20,000 for paving) | Car exposed to weather and sun | Budget-conscious homeowners |
| Covered parking | A standalone canopy or extension of the main roof | Car protected from rain and sun (20–25% cooler) | Additional cost (₹45,000–₹60,000) | Homeowners in rainy or hot climates |
| Stilt parking | Ground floor is entirely parking, living starts from first floor | Maximum security for car | Requires external staircase; living space is on higher floors | Luxury homes or high-density areas |
| Integrated parking | Parking is part of the ground floor plan with a folding shutter | Car is secure, design is cohesive | Higher construction cost (₹1.2–₹1.5 lakhs) | Most homeowners – balance of cost and convenience |
Design Features for Integrated Parking:
-
Shutter type: A folding shutter (₹25,000–₹35,000) is better than a rolling shutter because it can be painted to match the wall colour, making it less visually dominant
-
Parking depth: 18 ft minimum for a sedan, 20 ft for an SUV
-
Parking width: 8 ft for standard cars, 9.5 ft for SUVs
-
Ventilation: A small vent strip (1 ft × 4 ft) near the top of the garage door allows air circulation
-
Lighting: A sensor-based light at the entrance is convenient and saves electricity
Cost Comparison:
-
Open parking: ₹15,000–₹20,000
-
Covered parking: ₹45,000–₹60,000
-
Integrated parking with shutter: ₹1.2–₹1.5 lakhs
9. 20×50 North-Facing Front Elevation
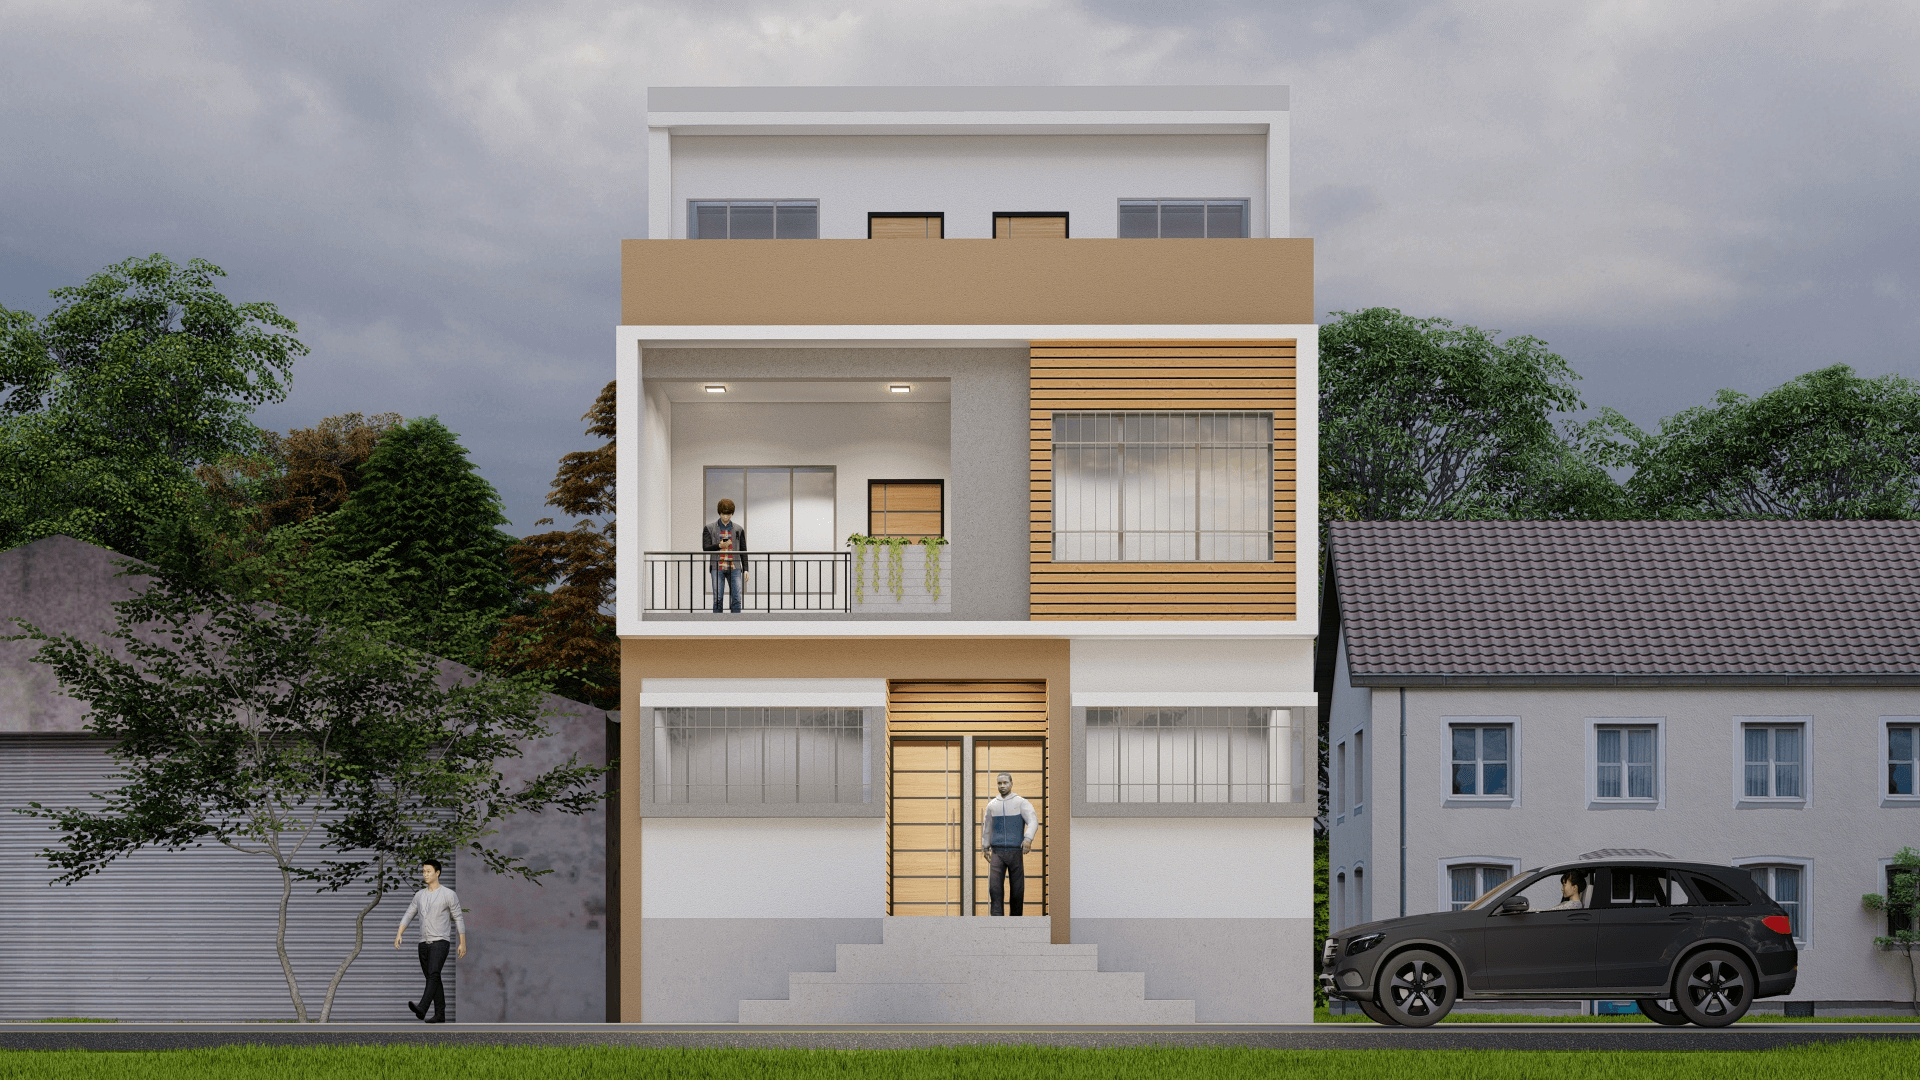
This design combines modern aesthetics with north-facing orientation principles.
Lighting Strategy:
-
Large windows: 6-ft tall windows (vs. standard 5 ft) to maximize limited north light
-
Glass selection: Use clear glass (not tinted) for north-facing windows as there’s no direct sunlight to block
-
White paint: The main body is white or warm white to reflect all available light into the house
-
Mirror effects: A small decorative mirror panel near the entrance reflects light and creates the illusion of more space
Key Features:
-
A modern entrance with a 5-ft wide door (larger than the standard 4 ft) to create a grand entry
-
Full-height windows (7 ft) on either side of the entrance, bringing light into the living room
-
A first-floor balcony stretching the entire width (20 ft), providing outdoor access for both bedrooms
10. 20×50 Duplex Front Elevation
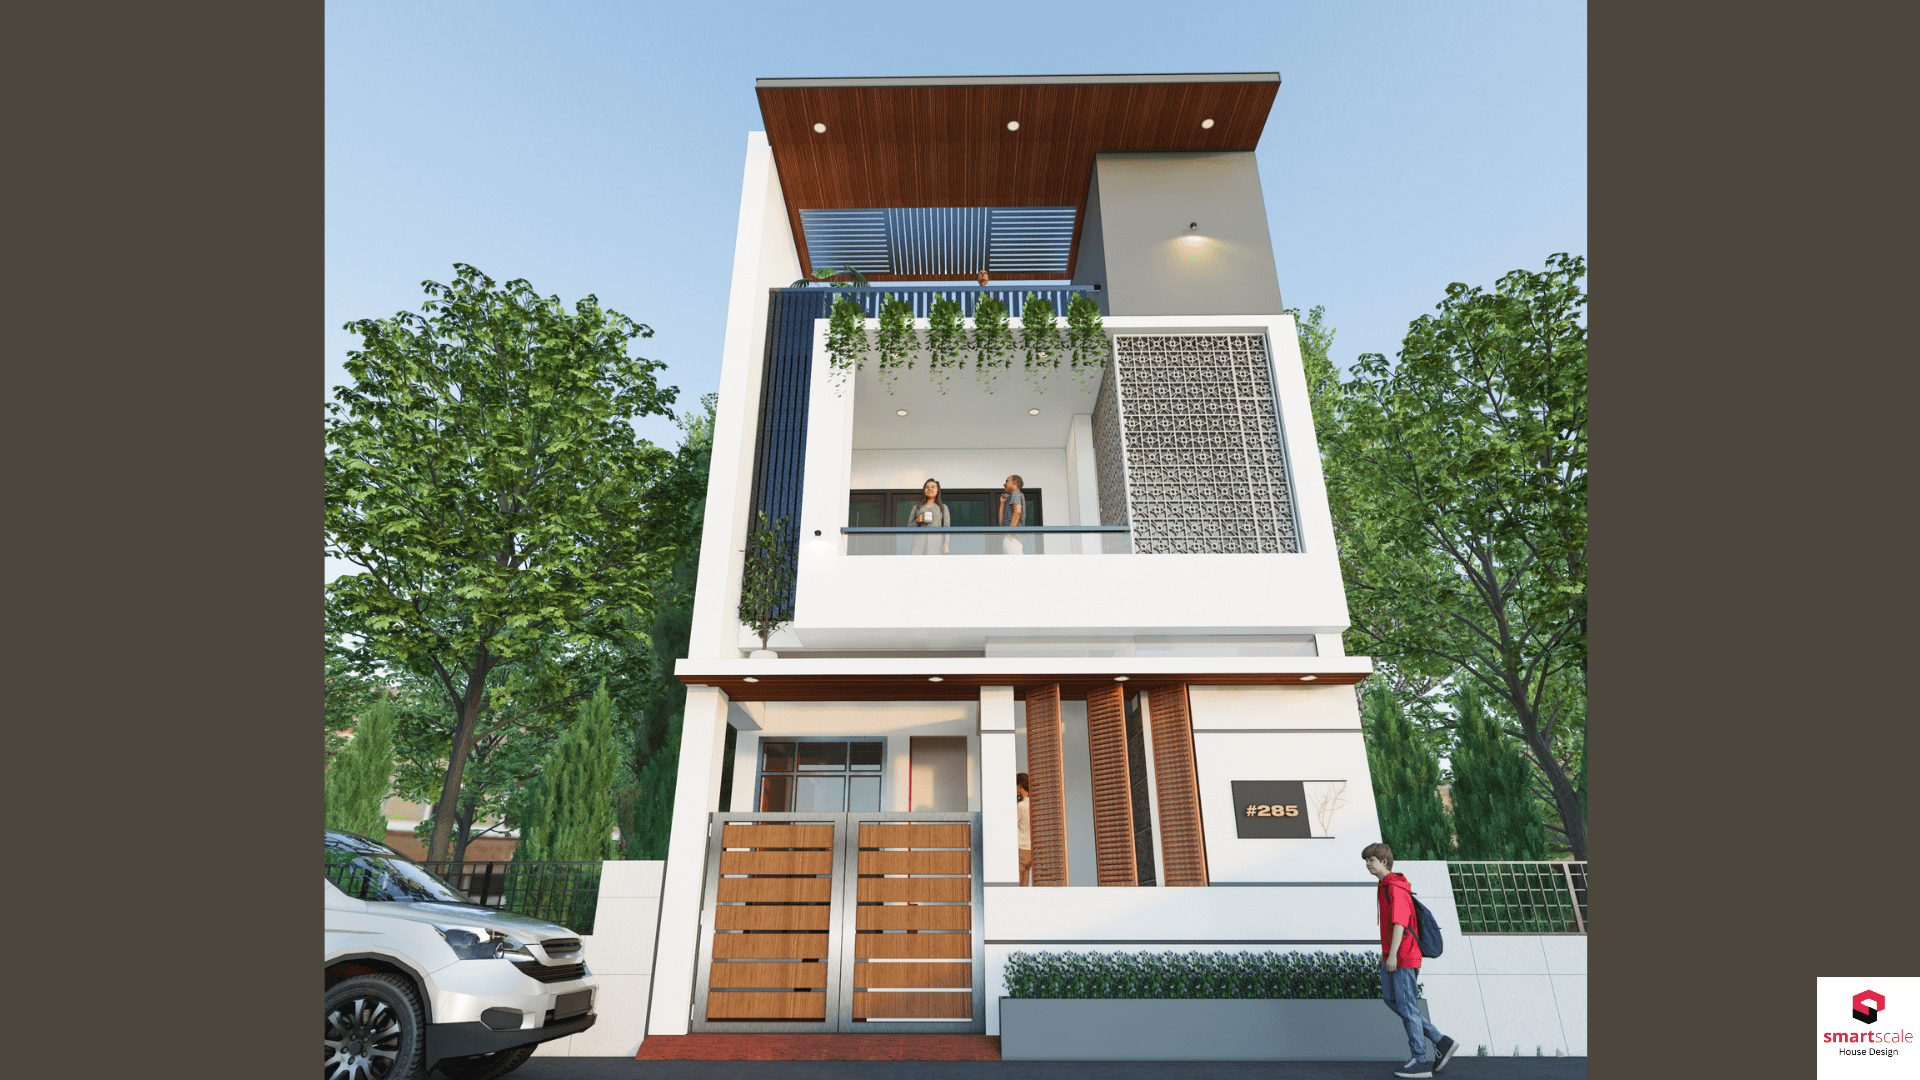
A duplex is designed for two families, with separate living units. The elevation must reflect this while maintaining architectural unity.
Distinct Features of Duplex Elevations:
-
Two entrances: One for each unit. These should be equally prominent, avoiding a “main” and “back” entrance look.
-
Separate balconies: Each unit typically has its own balcony. These are often positioned at different levels or on different sides.
-
Window pattern: Windows for Unit A and Unit B should be distinct but complementary.
-
A clear horizontal division: A material or colour change between the ground and first floor visually separates the two units.
How This Differs from Standard G+1:
| Aspect | Standard G+1 | Duplex |
|---|---|---|
| Entrances | One main door | Two separate doors |
| Balcony | One continuous balcony | Two separate balconies |
| Window design | Aligned vertically | Independent for each unit |
| Visual separation | None – unified design | A distinct horizontal line |
Example Layout:
-
Ground floor: Unit A (2 BHK)
-
First floor: Unit B (2 BHK)
-
The ground floor has its own entrance, and a separate staircase leads to the first-floor entrance
Construction Cost Difference:
-
Duplex design adds ₹50,000–₹80,000 in exterior finishing costs due to two entrances, separate balconies, and additional external staircase work.
11. 20×60 Modern Row House Elevation
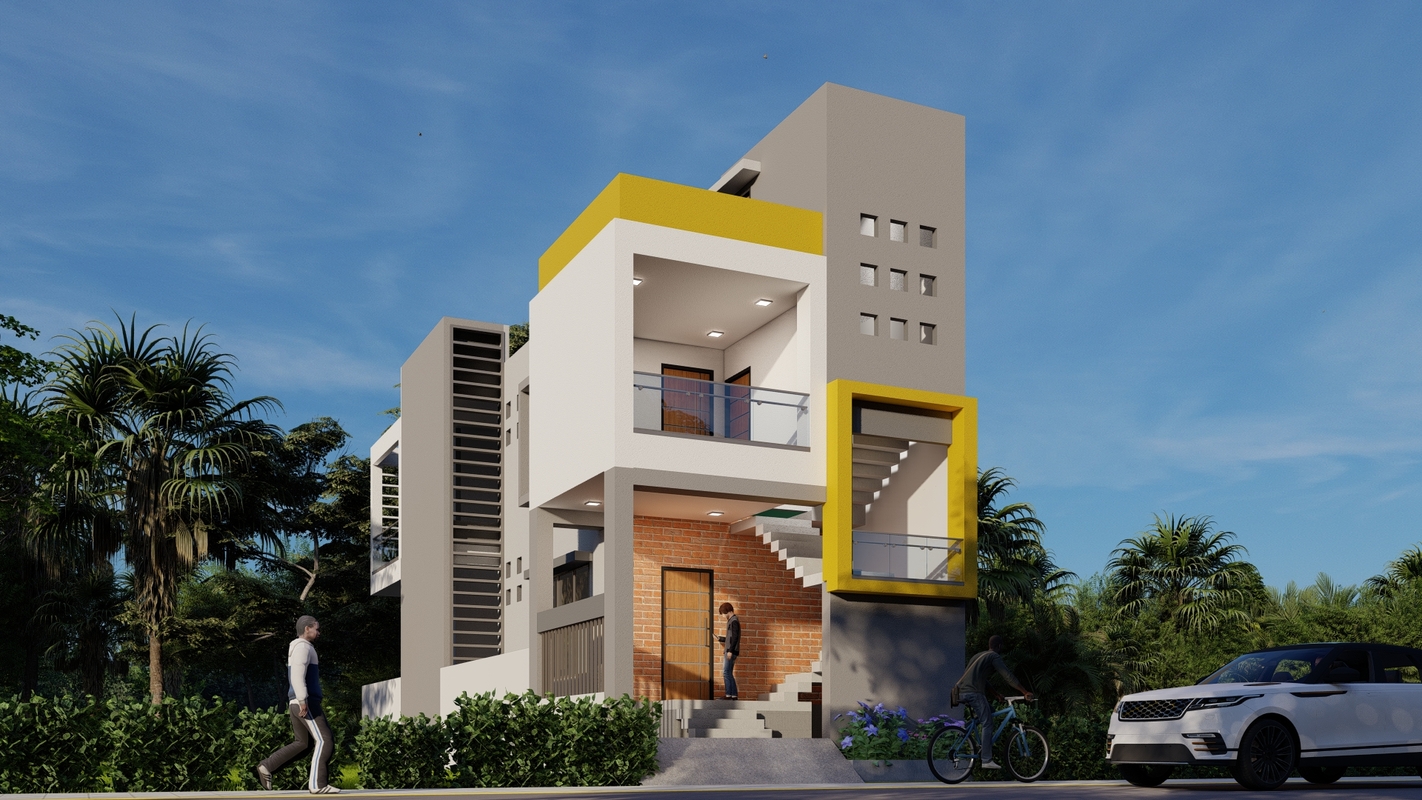
With even greater depth (60 ft) and the same narrow frontage, this design focuses on managing the long, linear shape.
Design Strategy:
-
Break the depth: The front elevation should look independent of the 60-ft depth. Avoid long horizontal lines – instead, use vertical lines to visually “cut” the depth.
-
Centralize the entrance: Place the main door in the centre to create a symmetrical focal point, which distracts from the narrowness.
-
Use a large balcony: A balcony that extends across the full 20-ft width creates a strong horizontal emphasis that balances the narrowness.
-
Landscaping: Even a small garden (4 ft × 8 ft) on one side of the entrance visually widens the property.
12. 25×40 Modern Front Elevation
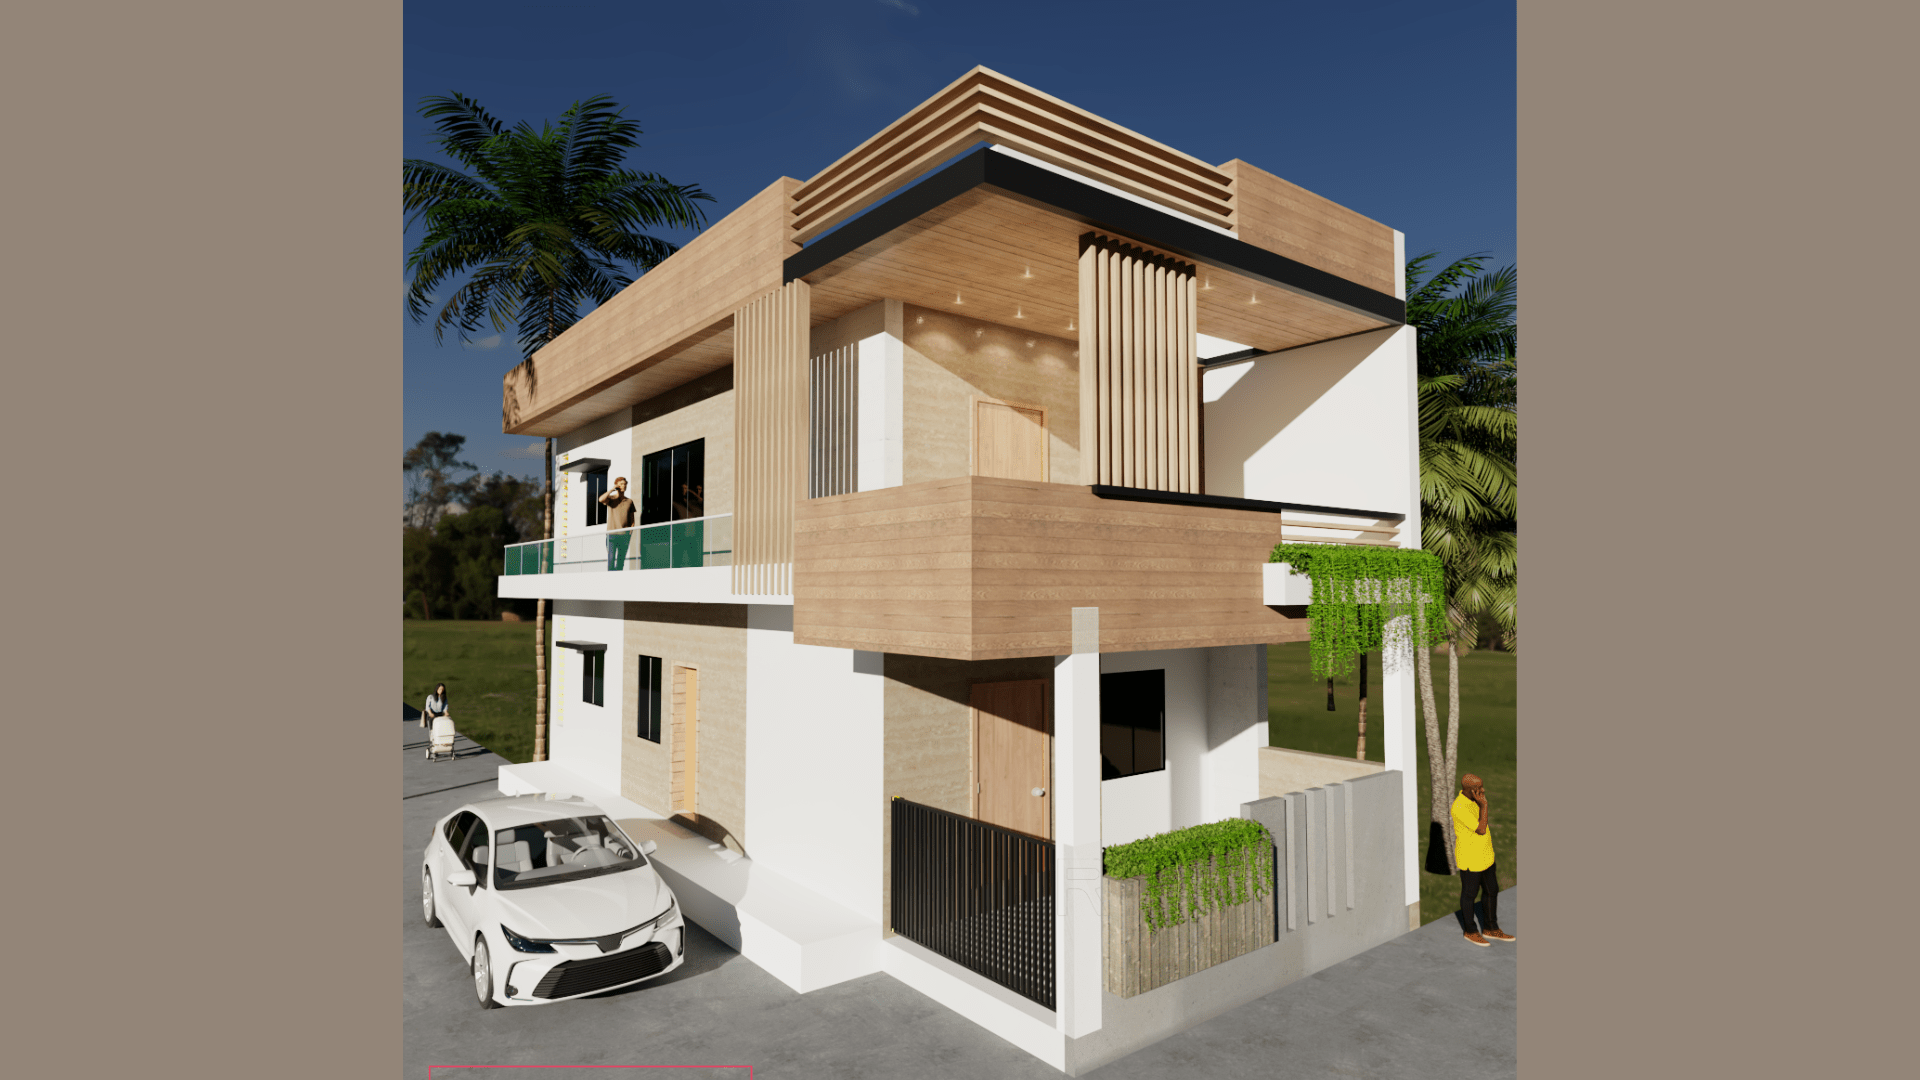
A wider frontage of 25×40 allows for a more expansive design.
Advantages of Wider Frontage:
-
Parking + Entrance: At 25 ft, you can comfortably have a 9-ft car parking bay and a 10-ft entrance area, with a 6-ft solid wall between them. On a 20-ft frontage, this is often cramped.
-
A symmetrical facade: With enough width, a symmetrical design becomes feasible – a central entrance with windows on both sides.
-
Larger balcony: A 16-ft wide balcony is now possible, compared to 12-14 ft on narrower plots.
Design Recommendations:
-
Balcony: 16 ft wide × 5 ft deep. This is large enough for outdoor furniture.
-
Parking: 9 ft wide × 18 ft deep. Covered by a canopy.
-
Entrance: A grand 5-ft wide door with sidelights (fixed glass panels on either side).
-
Feature wall: A 6-ft wide × 12-ft tall stone-clad wall on the right side.
Colour Scheme:
-
Base: Light grey textured plaster
-
Accent: Dark grey (on the balcony fascia)
-
Feature wall: Natural stone
13. 25×40 Contemporary House Elevation
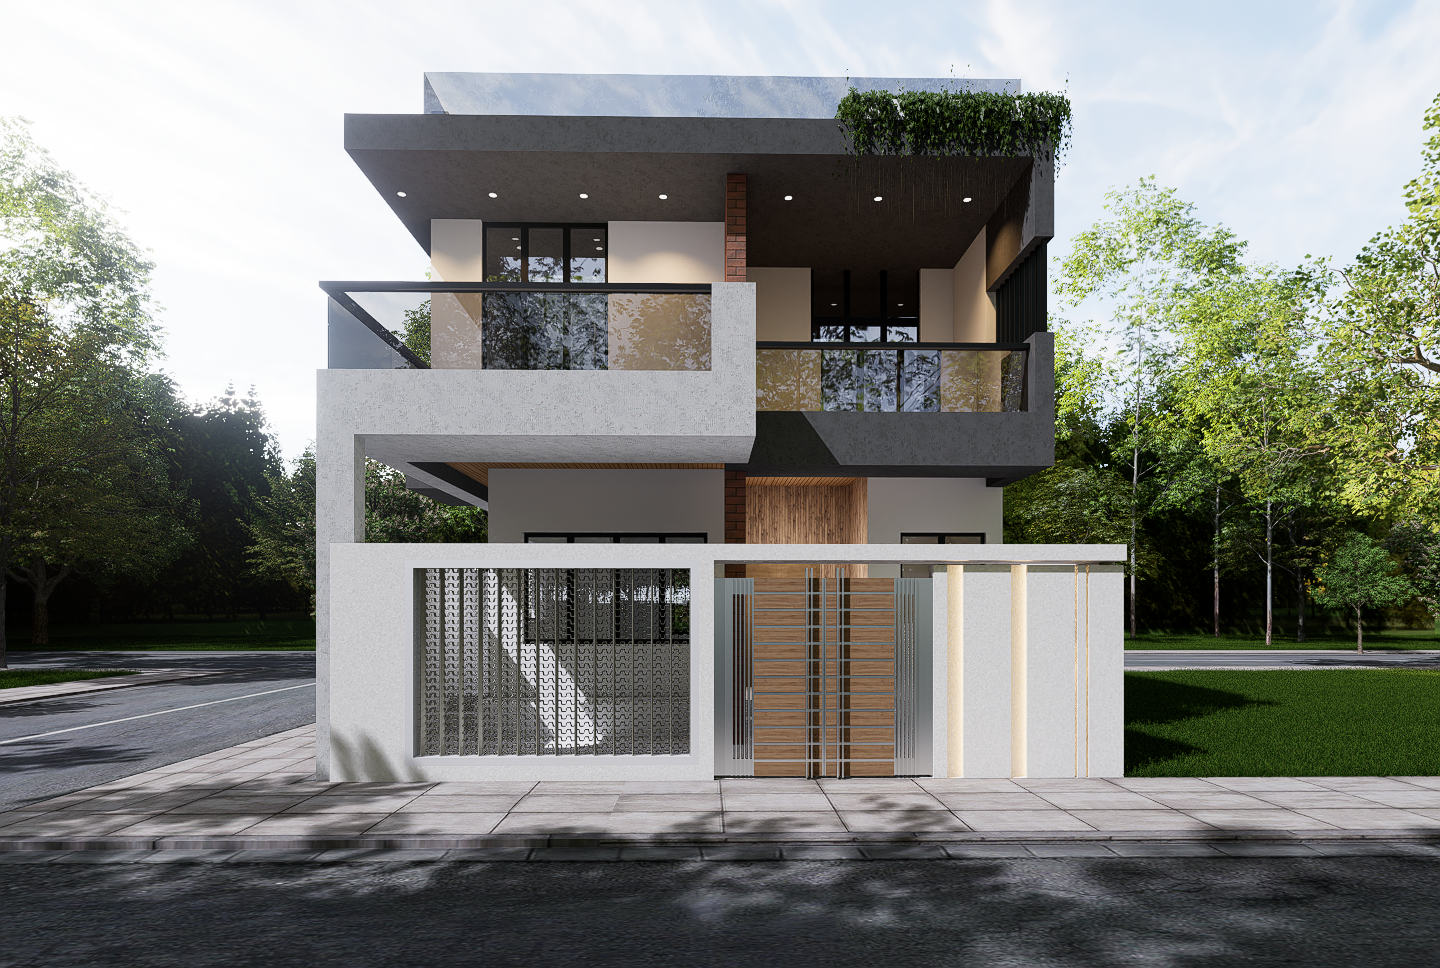
Contemporary design is defined by current trends, material mixes, and bold forms.
Material Combinations (25×40):
-
Option A – Warm Contemporary:
-
Base: Cream-coloured plaster (70% of the façade)
-
Accent: Wood-finish panels (20% – around the entrance and on the balcony)
-
Highlight: Charcoal grey paint (10% – on the front pillar)
-
-
Option B – Cool Contemporary:
-
Base: White smooth plaster (70%)
-
Accent: Grey stone cladding (20% – on the entrance column)
-
Highlight: Blue-grey window frames (10%)
-
Façade Proportions:
-
Window size: 4 ft × 5.5 ft (a taller-than-wide window creates a contemporary feel)
-
Window placement: 2.5 ft from the floor, leaving a 2-ft gap to the ceiling – standard for contemporary design
-
Balcony railing: Glass panels without horizontal bars – clean and minimal
-
Entrance canopy: A flat, thin canopy (just 4 inches thick) with hidden lighting
14. 30×35 Small House Front Elevation
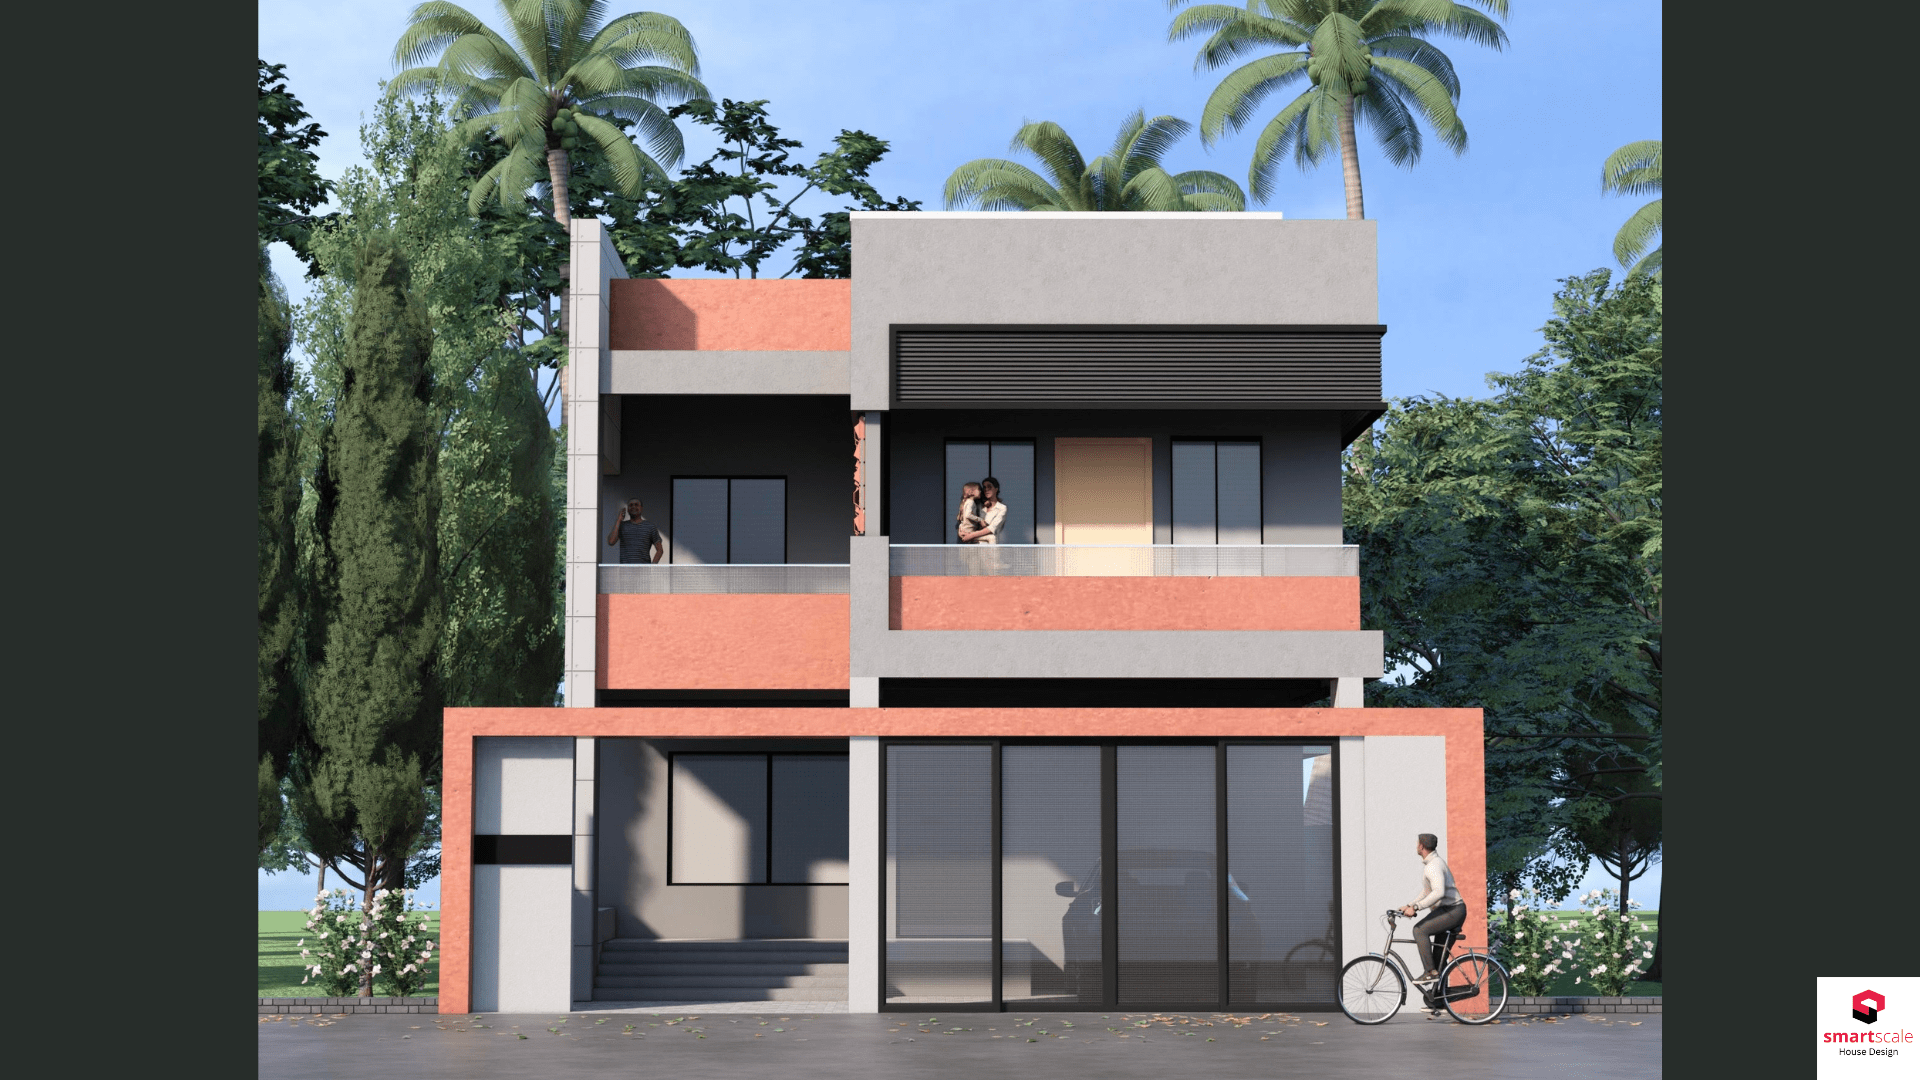
This size allows for more varied and spacious designs.
Bungalow-Style Options:
-
Single-floor bungalow: With 30-ft frontage, a single-floor home can have a spacious 20-ft porch, a large entrance, and beautiful landscaping in the front yard.
-
G+1 bungalow: The ground floor can have a larger living area, and the first floor can have a 20-ft wide balcony.
Key Design Elements for 30×35:
-
Entrance porch: 6 ft deep × 12 ft wide – large enough for outdoor seating
-
Landscaping: A 4-ft wide garden strip along the front, with a low (2-ft) compound wall
-
Parking: Covered parking for 2 cars, 18 ft wide × 18 ft deep
-
Windows: Larger than on smaller plots – 5 ft × 6 ft – to match the scale of the house
15. 30×35 House Elevation With Car Parking
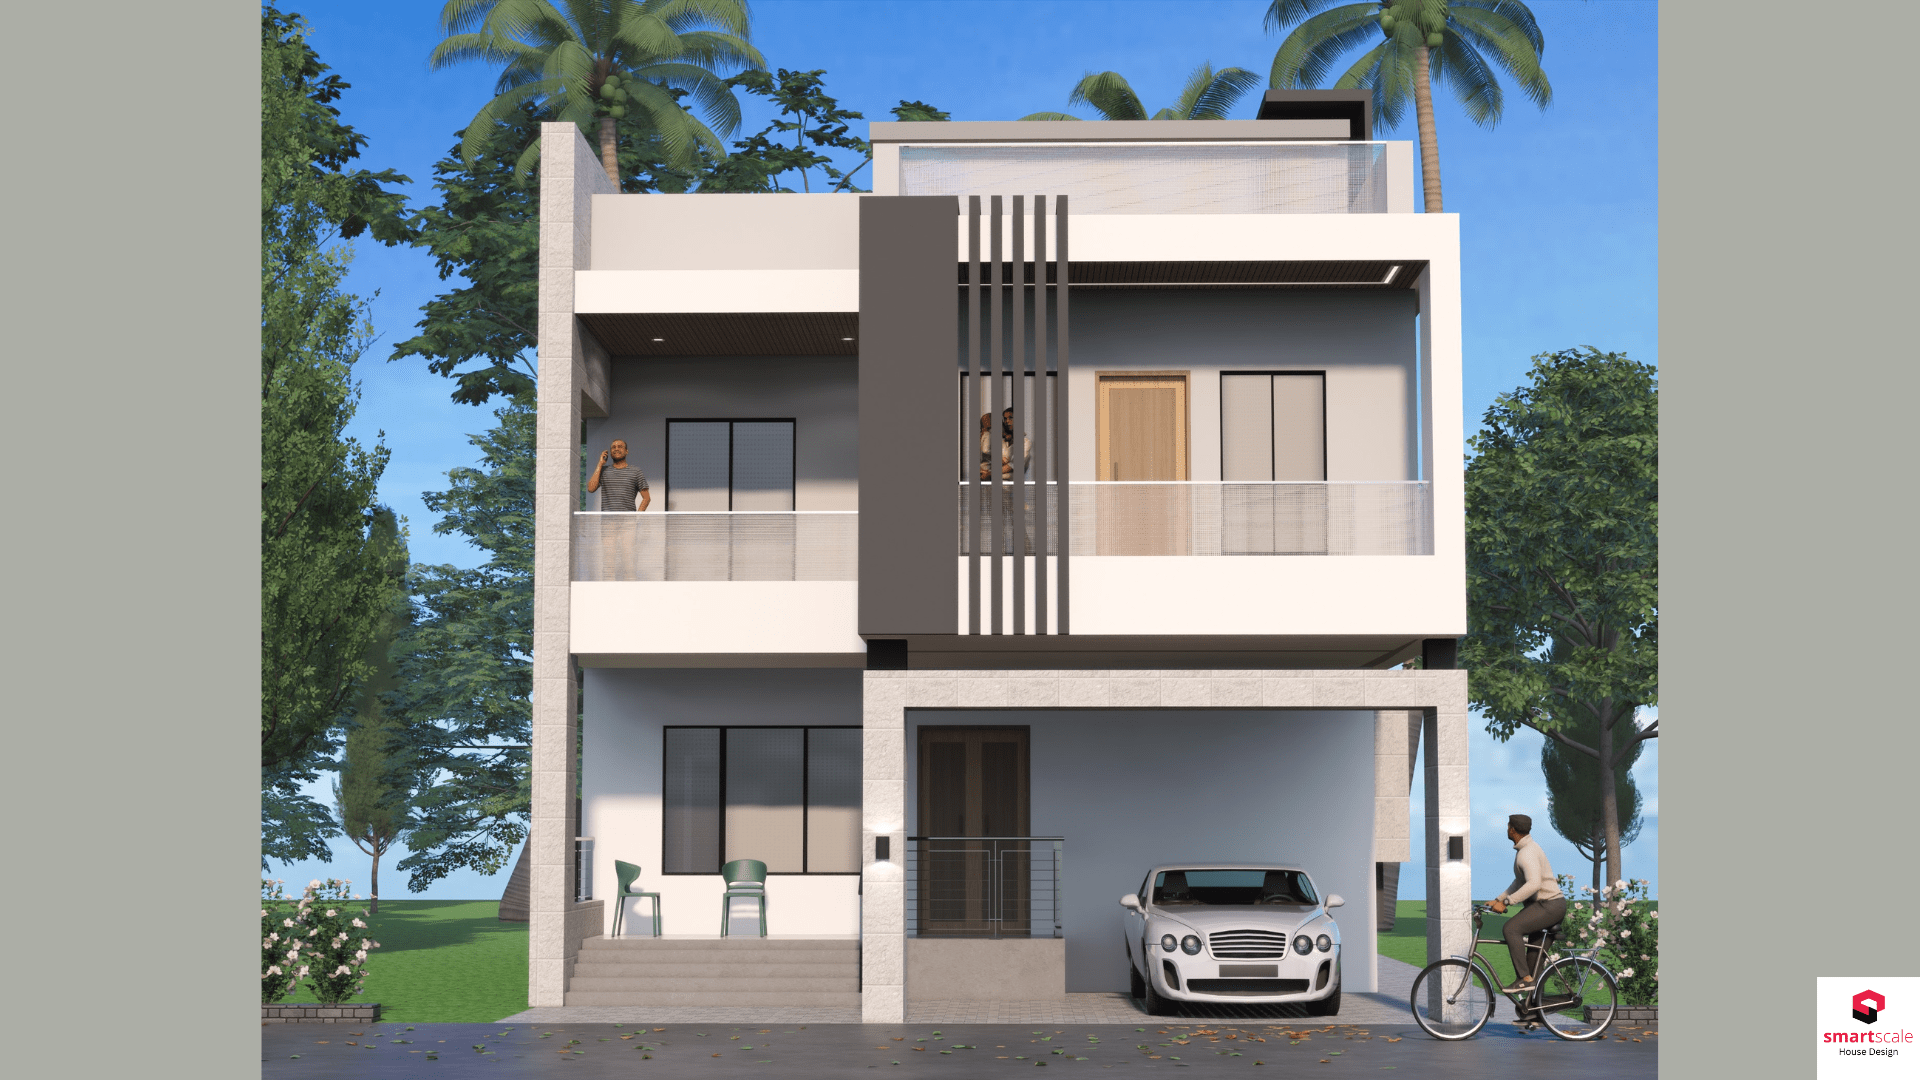
On a 30×35 plot, parking can be more elegantly integrated.
Parking Design:
-
Two-car parking: The wider frontage comfortably accommodates two cars. They can be side-by-side (16 ft wide × 18 ft deep).
-
Covered parking: A canopy that extends from the main roof, supported by two pillars.
-
Visual integration: The pillars can be clad with the same stone as the main house, making the parking structure part of the design rather than an afterthought.
Cost Implications for 2-Car Parking:
-
Canopy: ₹60,000–₹80,000
-
Paving: ₹35,000–₹45,000 (using paver blocks)
-
Shutters: ₹50,000–₹70,000 for two folding shutters
Small House Front Elevation Designs by Architectural Style
If you’re searching by style rather than plot size, these categories will help you find the perfect look.
Modern Front Elevation Designs
Modern elevations are characterized by clean lines and a geometric aesthetic.
Key Design Elements:
-
Geometry: Box-style forms, flat roofs, and asymmetrical compositions. The design often looks like a composition of rectangular boxes.
-
Materials: Glass, steel, concrete, and smooth plaster.
-
Windows: Large, unadorned, often fixed-glass panels.
-
Colours: Neutrals – white, grey, black, and beige.
Image Examples:
| Style | Description |
|---|---|
| Box-style | A composition of 2-3 rectangular blocks of different heights and depths |
| Geometric | Diagonal lines, triangular overhangs, and angular forms |
| Contemporary | A mix of modern materials – wood, glass, stone – creating a warm modern look |
| Minimalist | Extremely clean lines, almost no ornamentation, a focus on pure form |
Simple Front Elevation Designs
Simplicity works wonderfully on small façades.
Why Simplicity Works on Small Facades:
-
No visual clutter: A small area looks cramped if it’s busy. Simplicity opens up the space.
-
Cost-effective: Fewer materials and simpler forms are always cheaper to construct.
-
Timeless: Simple designs look good for decades. Trendy details often date a house.
Elements of a Simple Design:
-
A single, strong material (like smooth plaster)
-
2-3 colours maximum
-
Rectangular windows without decorative frames
-
A flat or low-pitched roof
-
No projections except a minimal canopy above the entrance
Minimalist Small House Elevation
Minimalism takes simplicity further – it’s almost an art form.
Design Checklist for Minimalist Elevations:
- Only 2 colours on the entire façade
- No decorative elements (cornices, mouldings, etc.)
- Windows are flush with the wall (no window frames projecting out)
- No visible drainpipes or AC units
- A single, simple entrance door
- Flat roof with no visible parapet
Material Palette:
-
Smooth white or warm grey plaster (90% of the surface)
-
Glass (5% – windows)
-
A single wood-finish element (5% – the main door)
Contemporary Small House Elevation
Contemporary design reflects what is trending right now.
Key Material Combinations:
-
Glass: Used extensively – for windows, railings, and accent panels
-
Wood finish: Adds warmth to modern forms. Use it for the entrance door, balcony soffit, and one accent wall.
-
Stone: Natural stone cladding adds texture. Use it sparingly – on a single pillar or on the compound wall.
-
Metal: Powder-coated aluminium for window frames, railings, and awnings.
Projections:
-
Contemporary designs often feature deliberate projections: a deep entrance canopy, a first-floor balcony, or even a floating room that projects over the parking area.
Traditional Indian Front Elevation
This style respects cultural heritage.
Traditional Elements:
-
Jali: Perforated stone or wooden screens used above windows or on the entrance gate.
-
Wooden doors: Intricately carved teak doors with brass handles.
-
Sloped roofs: Tiled or Mangalore tile roofs with a distinct pitch.
-
Traditional motifs: Peacocks, lotus, or geometric patterns in stone or metal.
-
Verandah: A covered porch with seating – an essential part of traditional Indian homes.
Material Costs (Traditional):
-
Carved wooden door: ₹80,000–₹1.5 lakhs
-
Jali screens: ₹300–₹500/sq ft (stone) or ₹200–₹350/sq ft (metal)
-
Tile roof (Mangalore tiles): ₹80–₹120/sq ft
Small Bungalow Front Elevation
A single-floor home with a distinct identity.
Key Features:
-
Roofline: A prominent roof with a clear eaves line. A gabled or hipped roof works best.
-
Porch: A 6-ft deep porch across the front – used for seating or planters.
-
Entrance: A 5-ft wide door with a canopy above.
-
Windows: Placed higher on the wall (3 ft from the floor) for privacy since there’s no upper floor.
Modern Duplex Front Elevation
Duplex homes, designed for two families, require special treatment.
Distinguishing Features:
-
Two entrances: Clearly separate but equally designed.
-
Two balconies: At different levels or positions.
-
A horizontal division: Often achieved with a change in material or colour between the ground and first floor.
-
Architectural unity: Both units share a common theme (material, colour, form) to avoid looking like two disconnected houses.
Small House Front Elevation Designs by Plot Size
Use this quick reference guide to identify the right design for your plot.
| Plot Size | Recommended Design | Key Reason |
|---|---|---|
| 15×30 | Compact Minimalist | Vertical lines maximize perceived height |
| 20×30 | Simple Modern | Clean lines prevent visual clutter on a modest width |
| 20×40 | Modern / Duplex | Balanced design for a standard compact plot |
| 20×50 | G+1 / Duplex | Projections and vertical elements work well |
| 20×60 | Row House / Duplex | Vertical design breaks the depth |
| 25×40 | Contemporary | Wider frontage allows material mixing |
| 25×50 | Modern Family Home | Space for parking, porch, and balcony |
| 30×35 | Bungalow / G+1 | Wide frontage enables grand entrances |
| 30×40 | Contemporary | Premium finishes and wider balconies |
| 30×50 | Premium Modern | Full design flexibility |
Front Elevation for 15×30 Small House
A compact minimalist design is essential. Focus on vertical elements – tall windows, vertical grooves, and a minimal entrance canopy. Use light colours to make the house appear larger. The parking, if needed, must be open and compact.
Front Elevation for 20×30 Small House
A simple modern design works best. Clean lines and a well-proportioned entrance can make this standard plot size look attractive and functional. Avoid projections – they take up too much of the limited frontage.
Front Elevation for 20×40 Small House
This popular plot size offers flexibility. Modern or duplex designs are ideal for maximizing space and creating a striking façade. A 4-ft balcony projection is feasible and adds value.
Front Elevation for 20×50 Small House
With a larger footprint, G+1 or duplex designs are excellent. They allow for more complex features like balconies, first-floor projections, and integrated parking.
Front Elevation for 20×60 Small House
Row house or duplex designs work well for this narrow but deep plot. The key is to use vertical lines and a consistent material palette to create a unified and attractive look.
Front Elevation for 25×40 Small House
A wider plot allows for contemporary designs with more expansive facades. This is a great size for a modern family home with a balcony and parking.
Front Elevation for 30×35 Small House
The wider frontage is perfect for bungalow-style homes or G+1 designs. It allows for a more welcoming porch, landscaping, and a grander entrance.
Front Elevation for 30×40 Small House
This plot size is ideal for a contemporary design. It offers the space for a premium appearance with more elaborate materials and architectural features.
Small House Front Elevation Designs by Number of Floors
Choosing the right elevation for your number of floors is crucial for aesthetics.
Single-Floor Small House Front Elevation
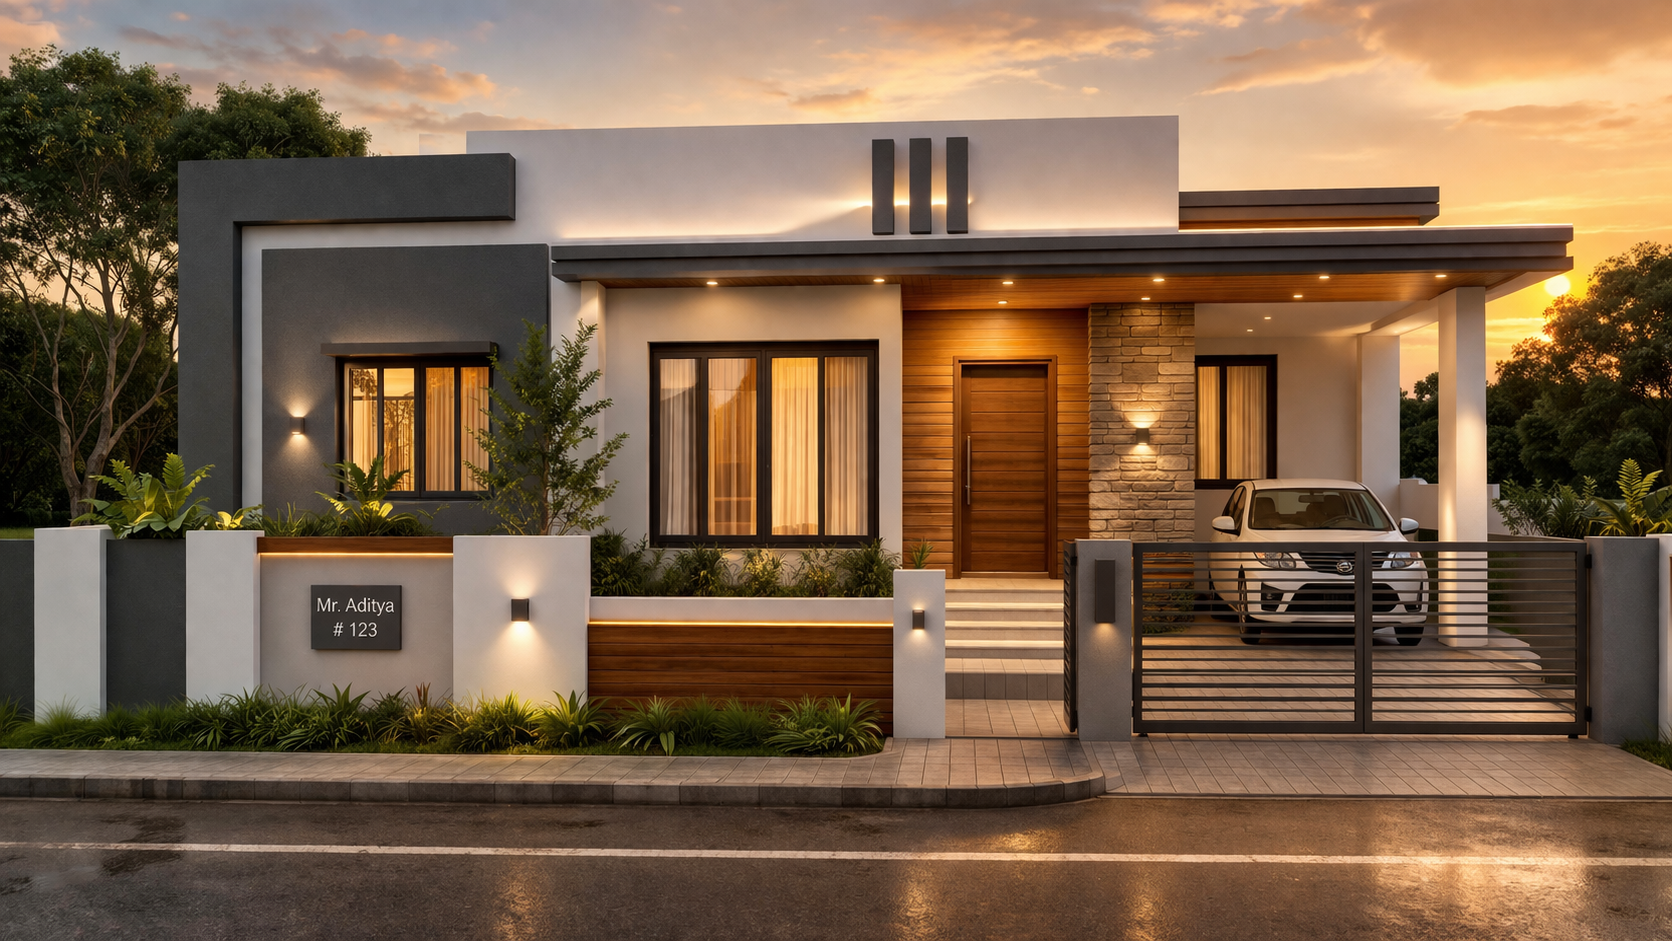
The design should create a strong visual identity on a single level.
Key Design Focus:
-
Roofline: A prominent, clear roofline defines the house. A gabled roof with a 30° pitch is common. The eaves should project 2 ft from the wall to create shade.
-
Porch: A 5-ft deep porch with seating is a great design element. It extends the living space outdoors.
-
Entrance: A 5-ft wide door is standard. The door should be centrally placed or offset by 2-3 ft – never at the extreme edge.
-
Windows: Place windows 3 ft above the floor to maintain privacy (since the ground floor is the only floor, passersby can see in easily).
-
Feature wall: A stone-clad or differently painted wall (6-8 ft wide) creates a focal point.
G+1 Small House Front Elevation
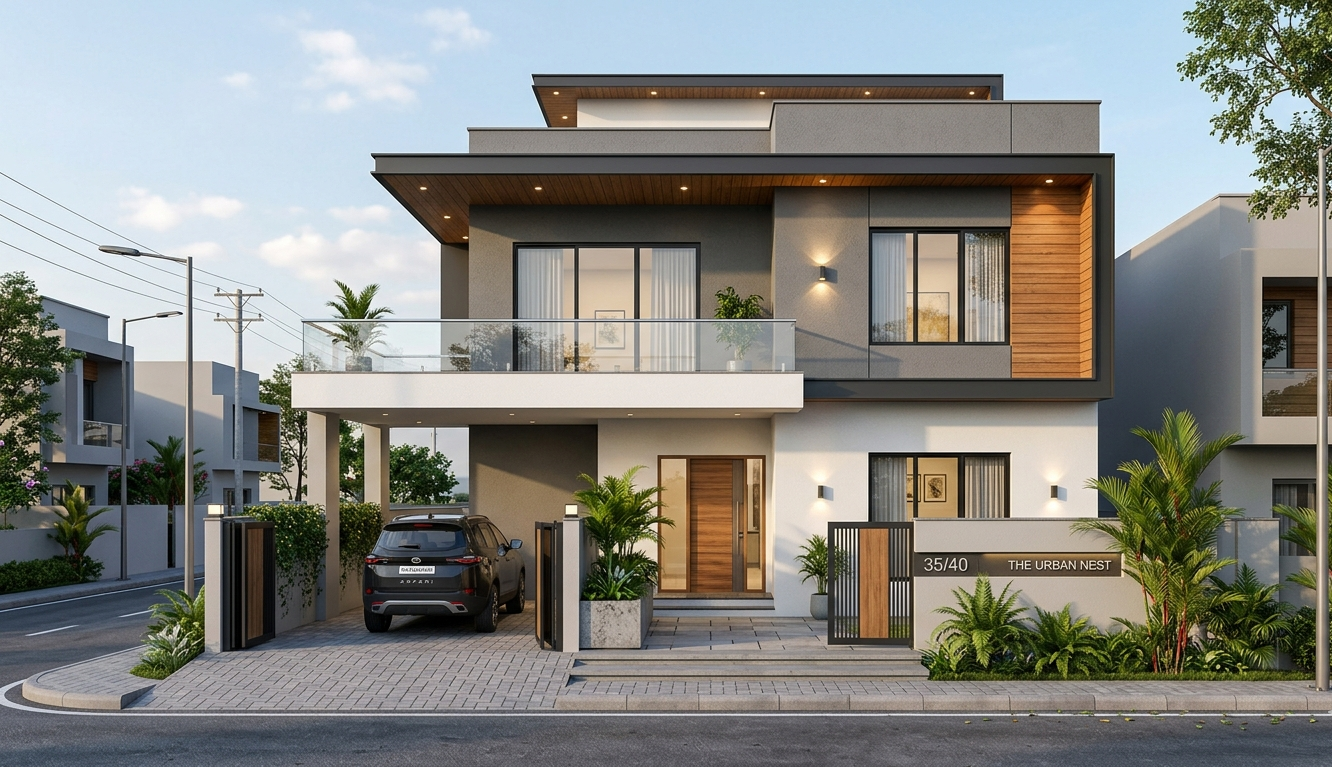
Managing ground and first-floor elements requires careful planning.
Key Design Focus:
-
Balcony: A 4-ft deep balcony is standard. It should be positioned above the living room or parking to be functional.
-
First-floor projection: A 3-4 ft projection creates depth and provides shade to ground floor windows.
-
Ground-floor parking: If parking is on the ground floor, the garage door should be a folding shutter that blends with the wall.
-
Vertical alignment: Windows on the first floor should align with windows on the ground floor for structural simplicity and visual rhythm.
G+2 Small House Front Elevation
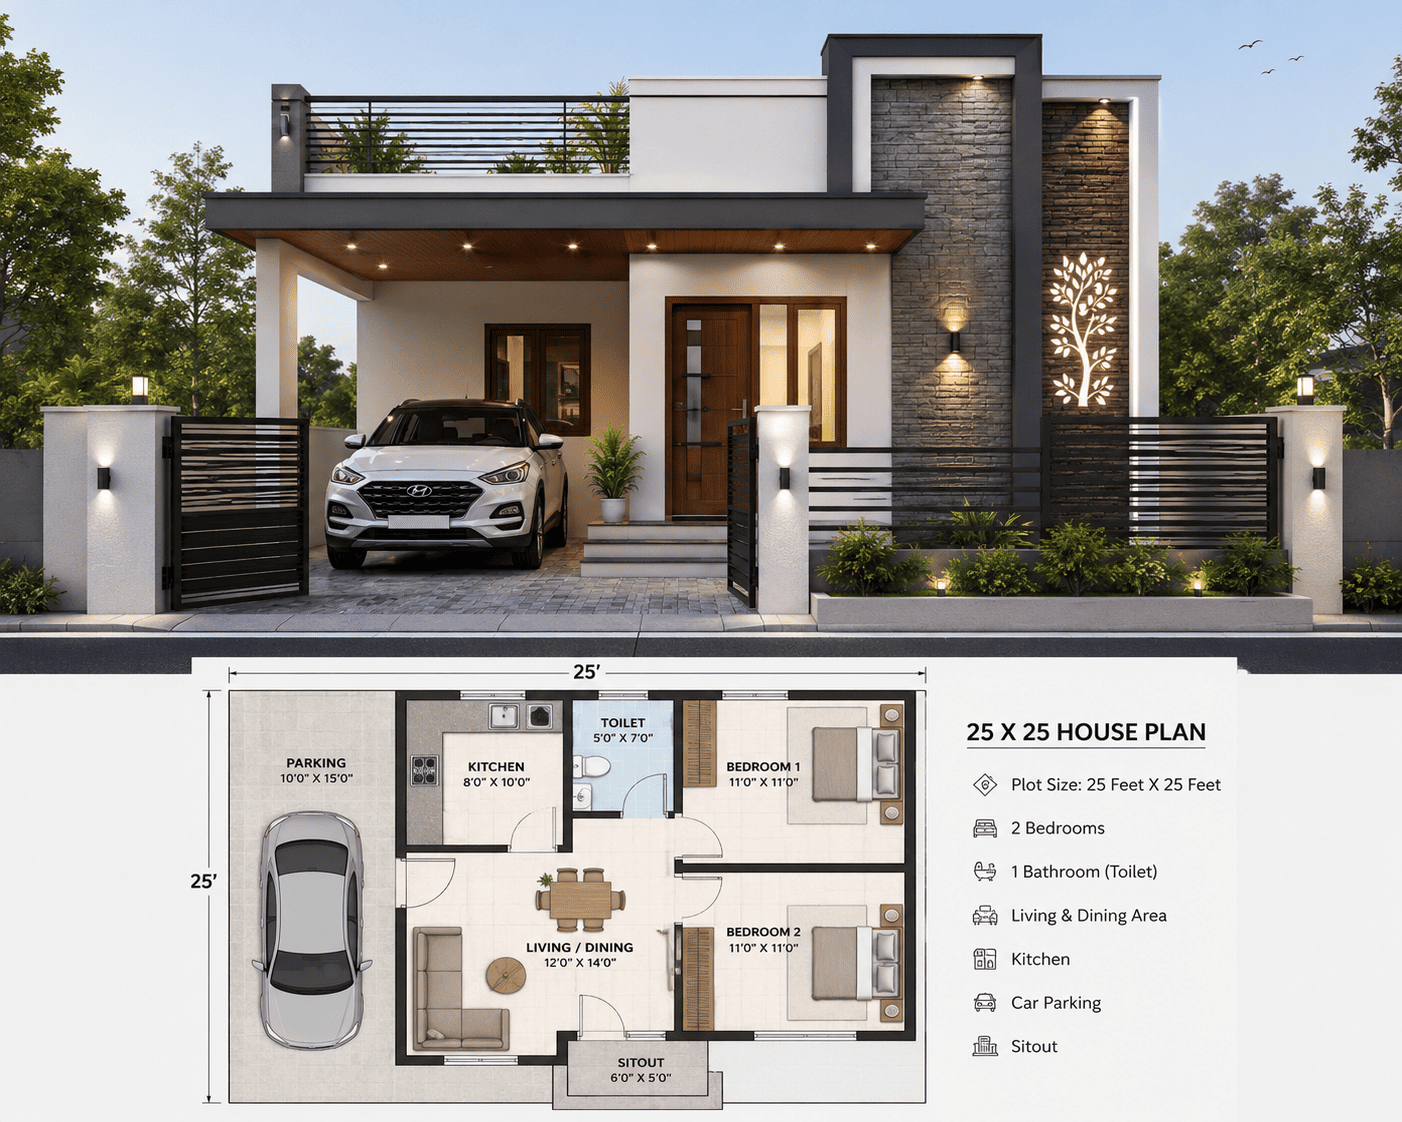
For three-story homes, the emphasis is on vertical proportions.
Design Checklist:
- Consistent floor heights (9-10 ft each) for visual harmony
- Balconies at each level, at least on the first and second floors
- Windows aligned vertically across all three floors
- A clearly defined roofline
- Vertical grooves or lines to enhance the height
Small Duplex House Front Elevation
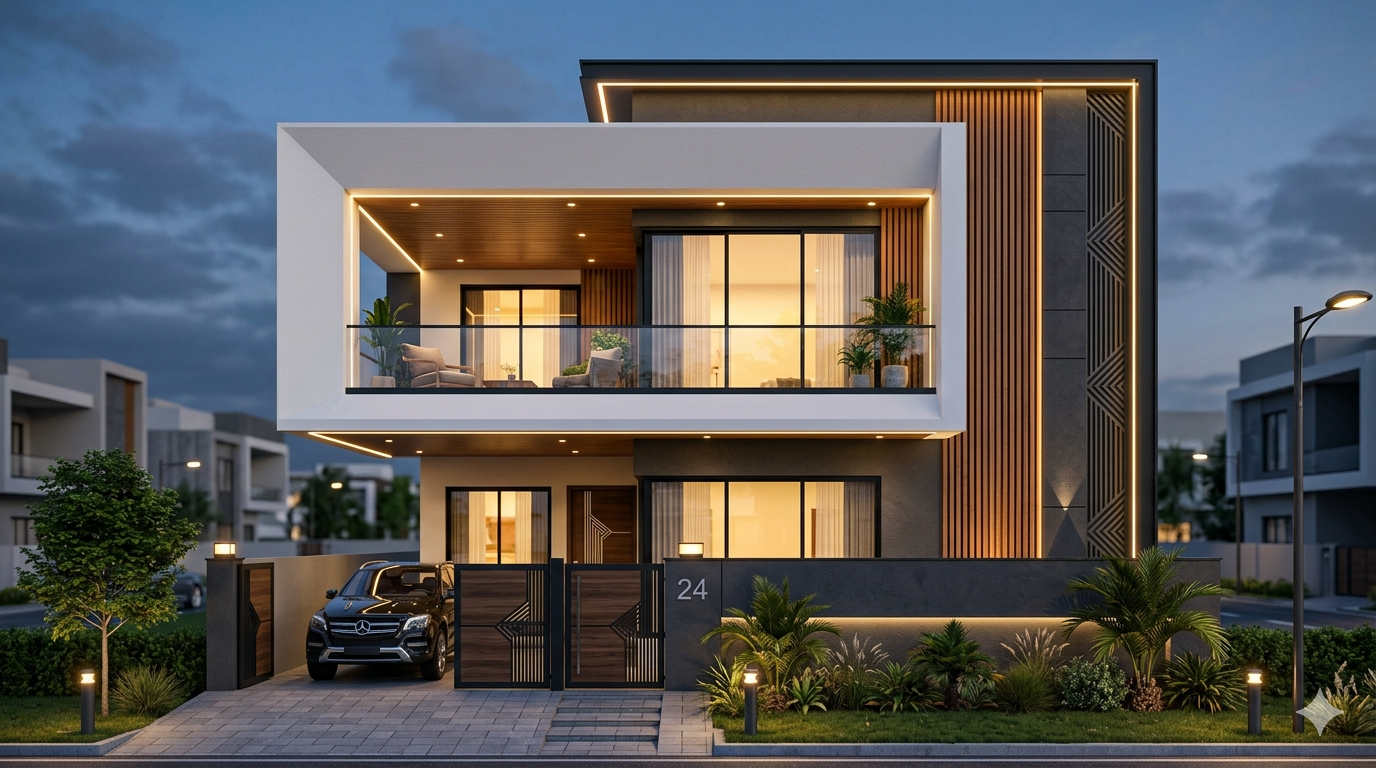
Duplex homes are distinct from standard G+1 homes.
Key Differences:
| Aspect | Standard G+1 | Duplex |
|---|---|---|
| Purpose | One family | Two families |
| Entrances | One | Two |
| Staircase | Internal | External + Internal |
| Design Philosophy | Unified | Divided yet unified |
Design Recommendations:
-
Separate entrances on the ground floor (one for each unit)
-
Each unit should have its own distinct balcony
-
A horizontal line (material change) between the floors visually separates the units
Small House Front Elevation Designs With Car Parking
Parking is a major consideration for homeowners. Here are detailed design concepts.
1. 20×40 Plot with Open Parking
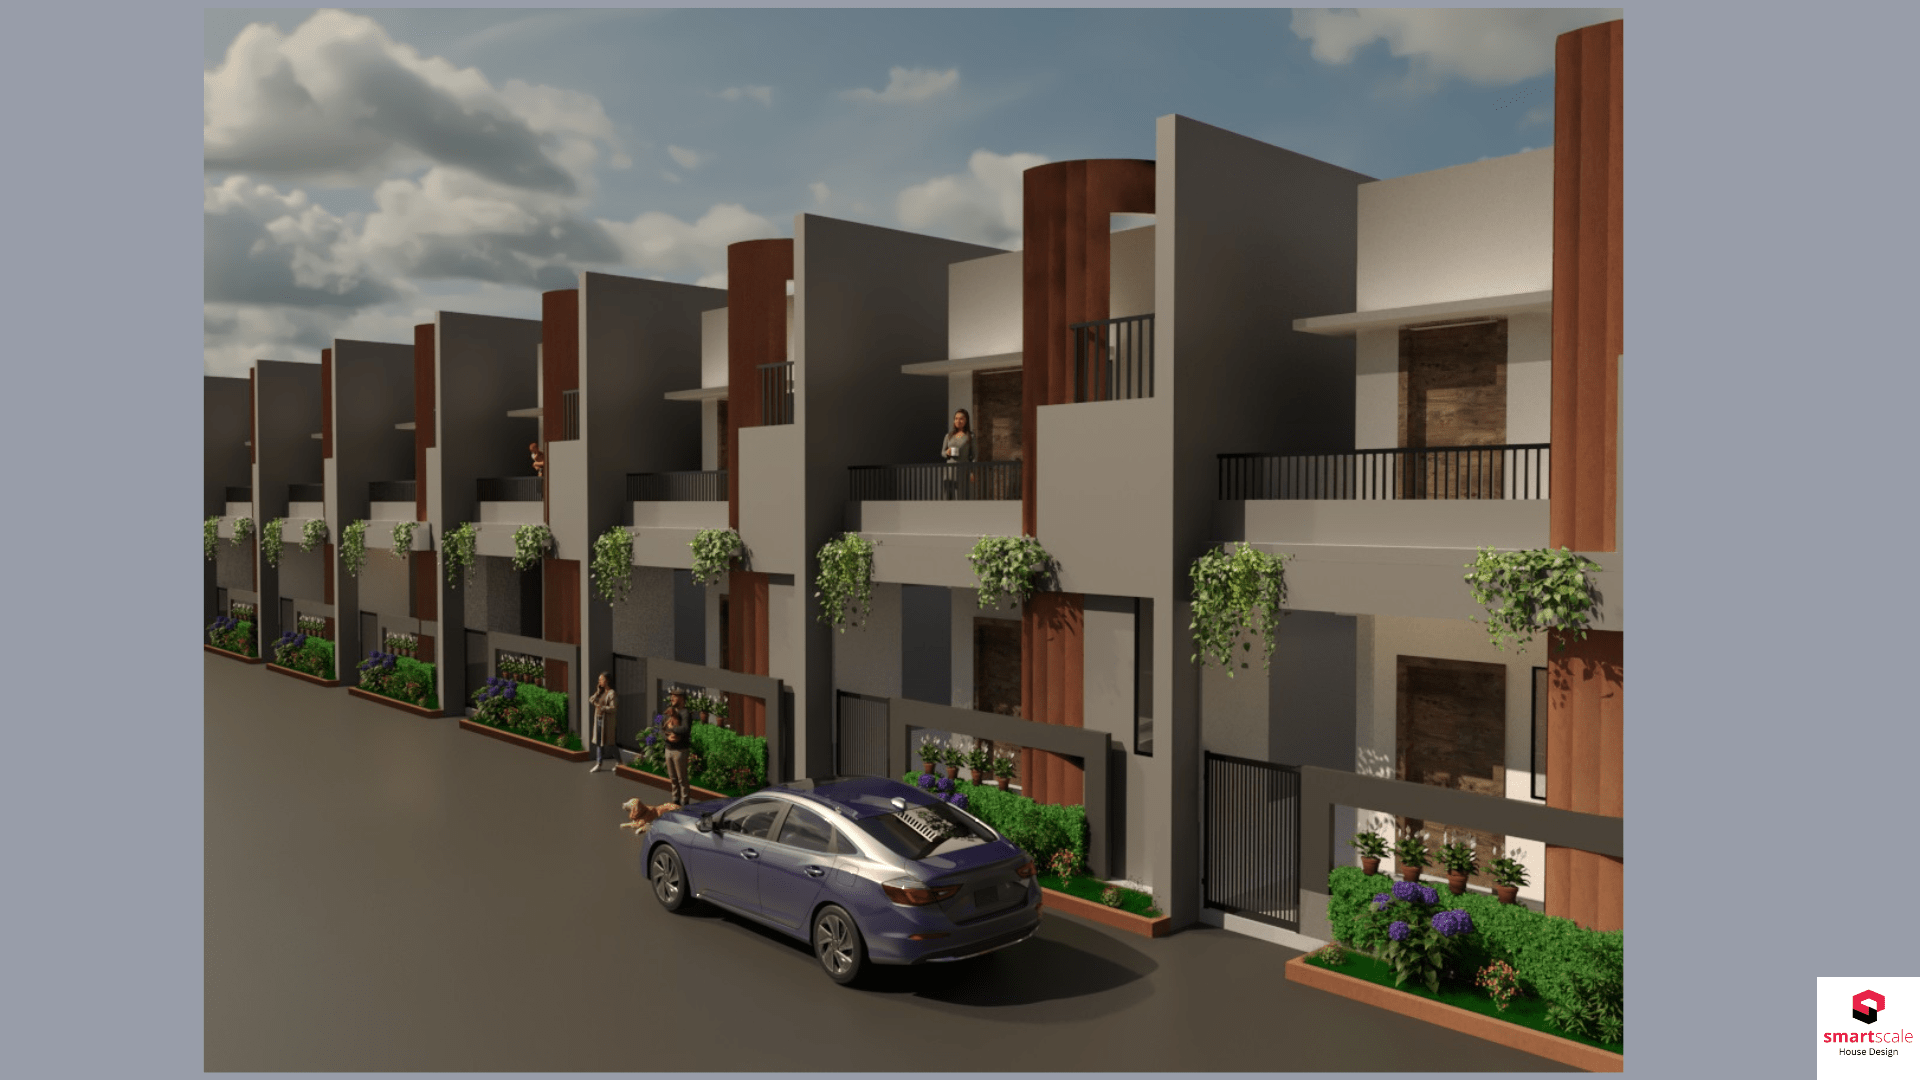
Plot Size: 20×40
Parking Type: Open parking on the left side
Design Features:
-
A 9-ft wide × 18-ft deep parking bay
-
Paver blocks used for the parking surface (₹45–₹60/sq ft)
-
A 4-ft wide pathway from the parking bay to the entrance
-
A low (2.5-ft) boundary wall separating the parking from the neighbour’s property
Best Suited For: Budget-conscious homeowners in areas with low vehicle theft risk
2. 20×50 Plot with Covered Parking
Plot Size: 20×50
Parking Type: Covered carport
Design Features:
-
A canopy extending 10 ft from the main house, supported by two steel or RCC pillars
-
The canopy matches the main roof design (material and colour)
-
The car is protected from rain and sun
-
A sensor light is installed on the canopy
-
The parking bay is 10 ft wide (fits the 20-ft frontage comfortably)
Best Suited For: Homeowners in rainy or hot climates
Cost: ₹55,000–₹75,000 for the canopy
3. 25×40 Plot with Stilt Parking
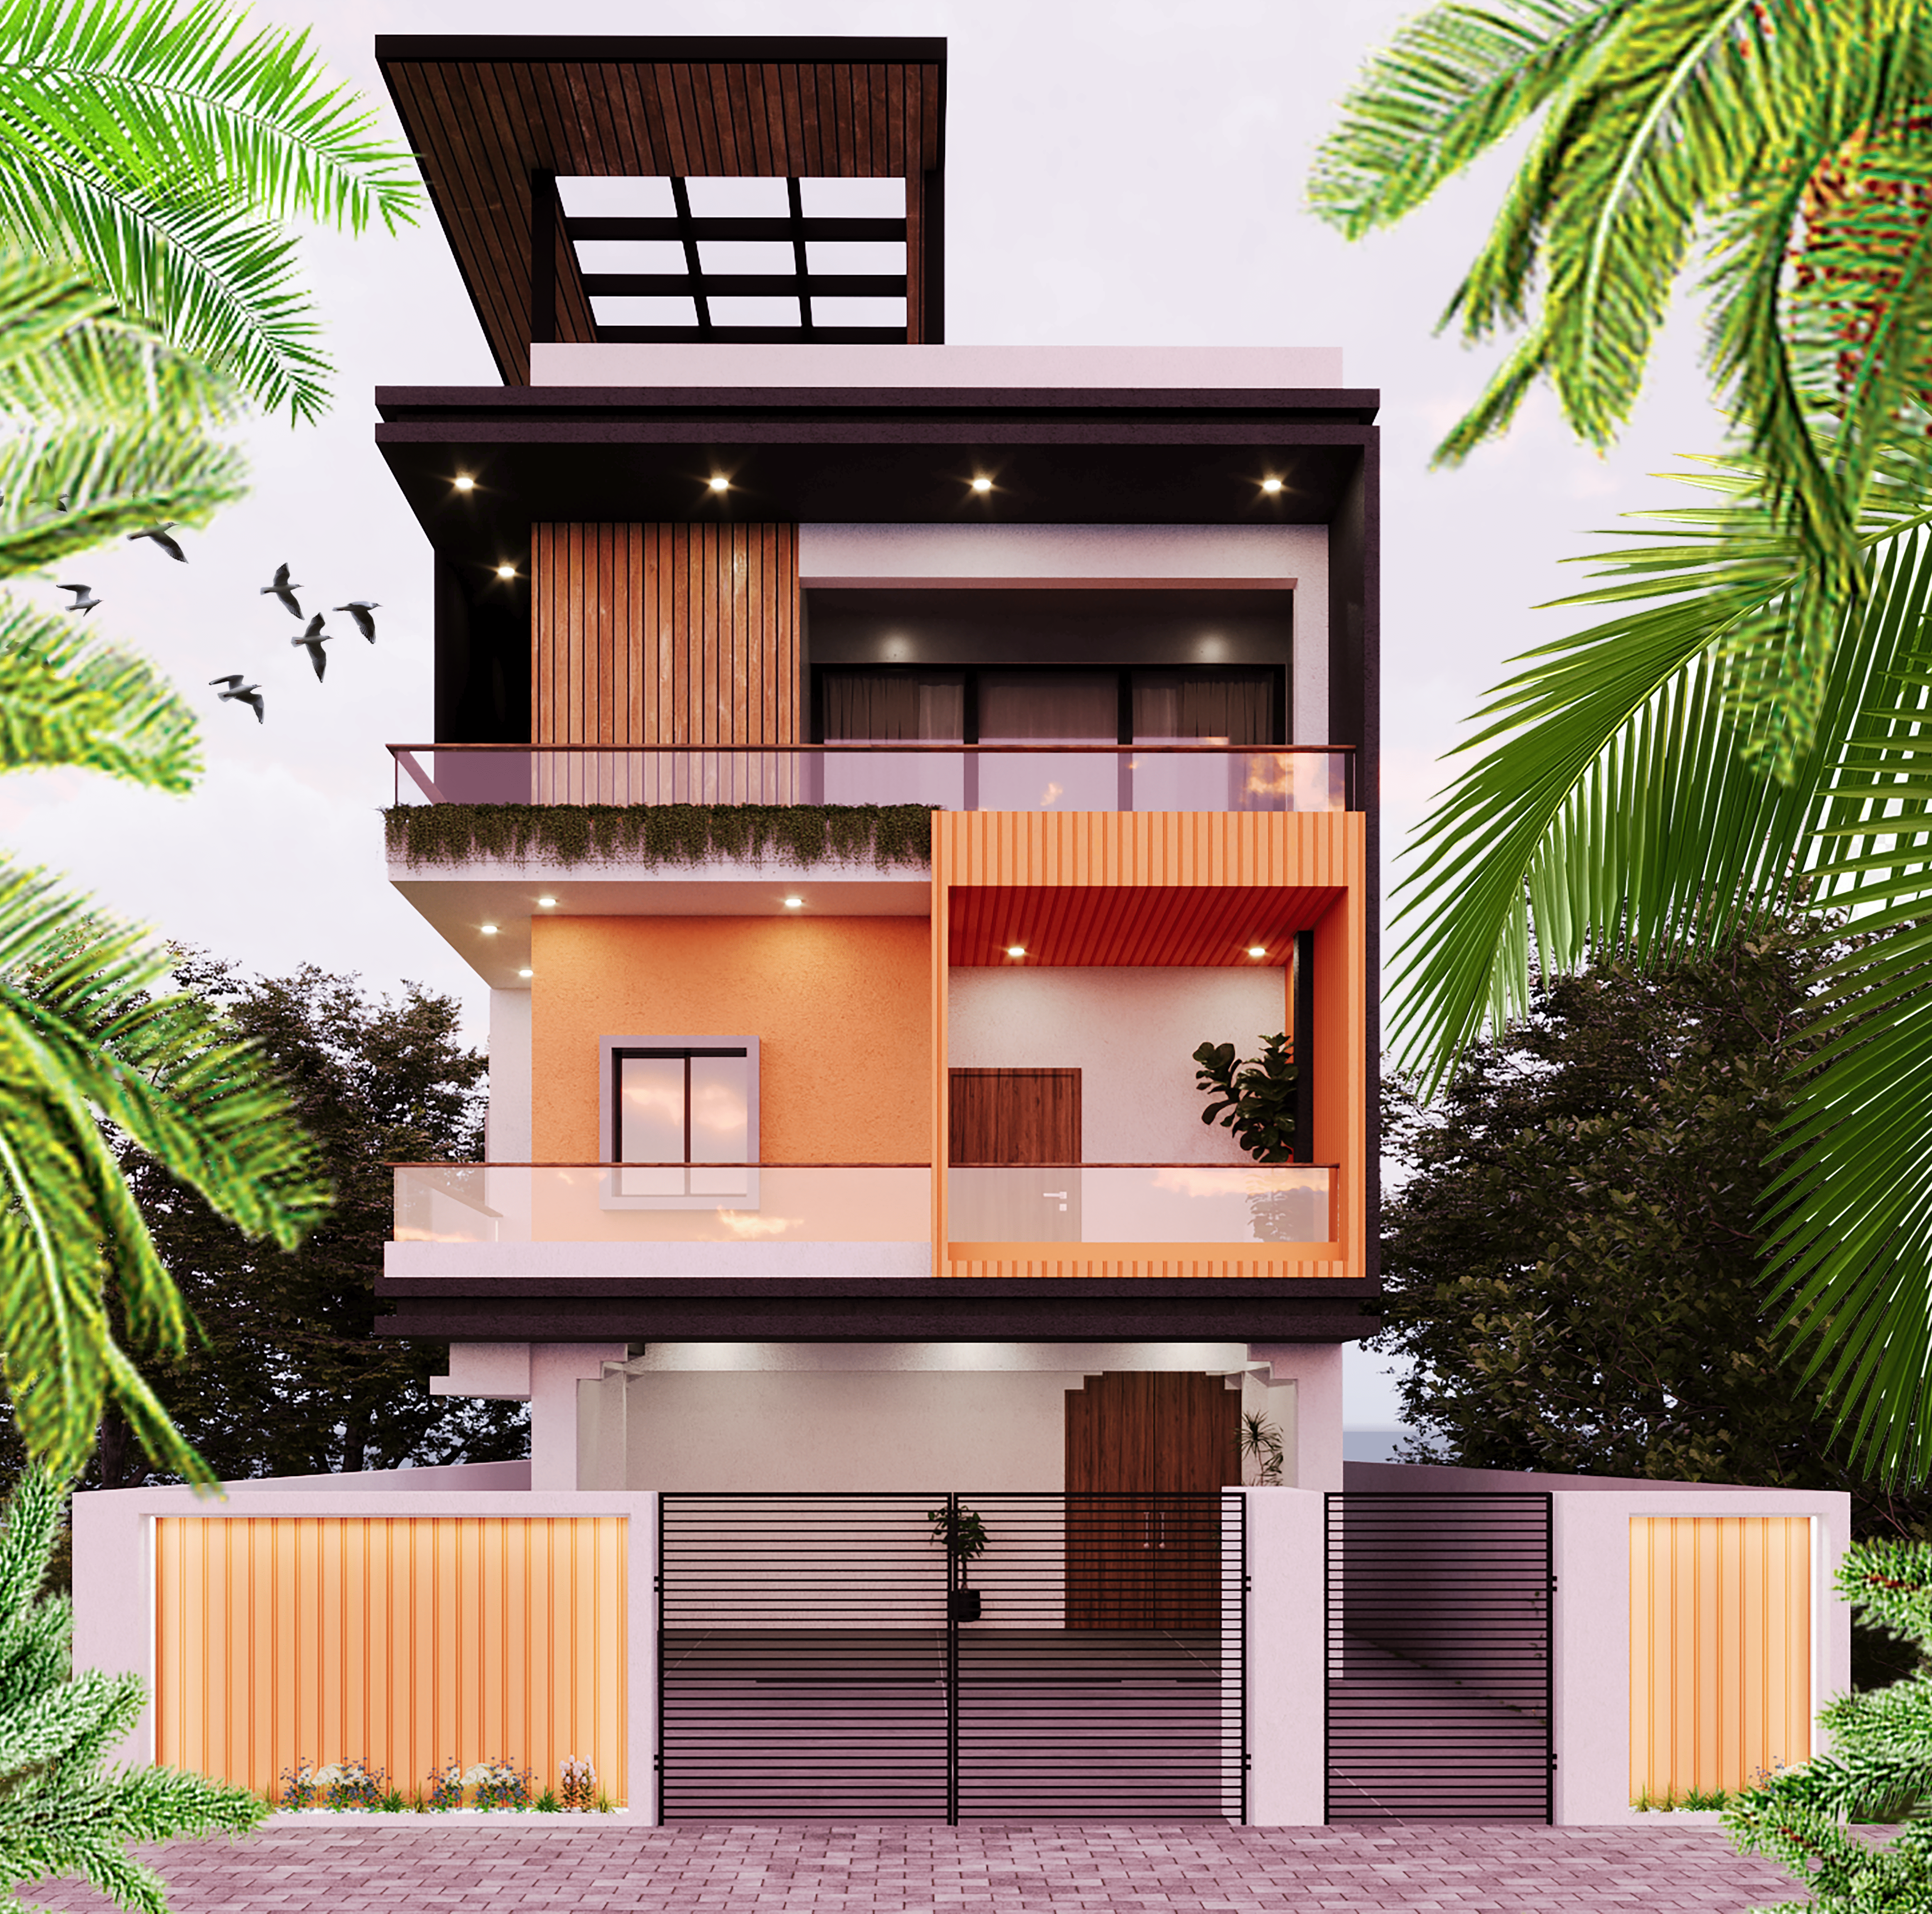
Plot Size: 25×40
Parking Type: Stilt parking on the ground floor
Design Features:
-
The entire ground floor (25×40 ft) is parking for 2-3 cars
-
The living area starts from the first floor
-
An external staircase leads to the first-floor entrance
-
The ground floor has a 10-ft clear height for SUV parking
-
Pillars are at 10-ft intervals, leaving the rest open
Best Suited For: Luxury homes, homes on flood-prone land, or when car security is a top concern
Cost: Stilt parking adds ₹1.8–₹2.5 lakhs to the construction cost vs. a ground-floor living area
4. 20×40 Plot with Parking Under a Balcony
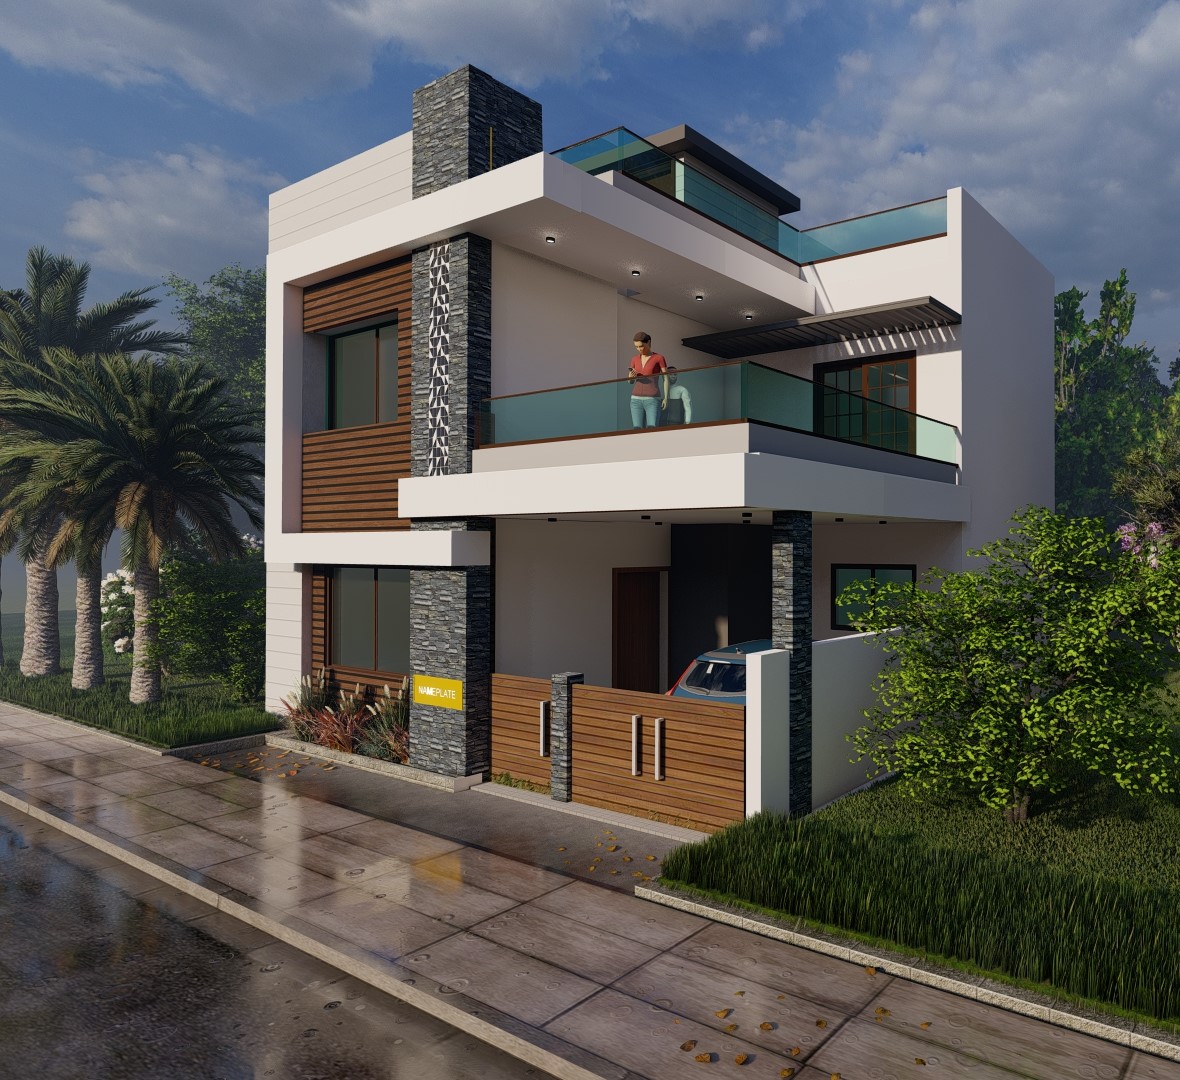
Plot Size: 20×40
Parking Type: Covered parking under the first-floor balcony
Design Features:
-
The first-floor balcony projects 4 ft, creating a covered parking area below
-
The parking bay is 10 ft wide × 18 ft deep
-
The balcony soffit (ceiling) is finished with wood-finish panels, making the parking area look premium
-
A folding shutter (painted to match the wall) provides security
Best Suited For: Most homeowners – it’s the most efficient use of space
5. 25×40 Plot with Parking + Porch
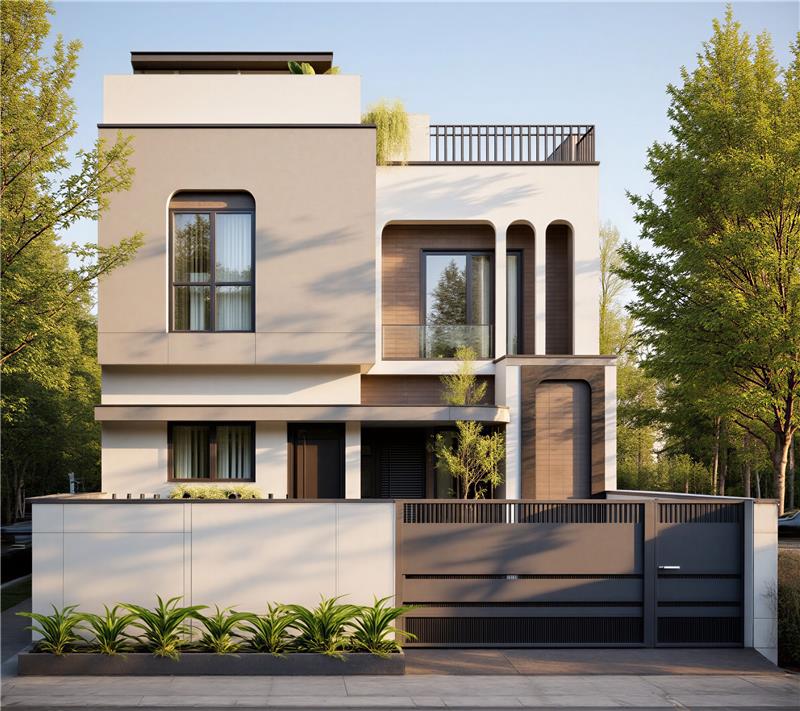
Plot Size: 25×40
Parking Type: Covered parking + a porch
Design Features:
-
Left side: 9-ft wide × 18-ft deep covered parking
-
Right side: 6-ft wide × 8-ft deep porch with seating
-
The porch and parking are under a single, continuous canopy
-
This creates a 15-ft wide, 18-ft deep covered area in the front – the parking is tucked to the left, and the porch is adjacent to the entrance
Best Suited For: Families who want a social front space
Cost: ₹1.2–₹1.6 lakhs for the canopy and flooring
Best Materials for Small House Front Elevation
The choice of materials significantly impacts the final look, cost, and maintenance.
Exterior Paint
Overview: The most common and cost-effective finish.
Cost: ₹25–₹35/sq ft (for 2 coats + primer)
Types:
-
Acrylic emulsions: Good durability (3-5 years), ₹25–₹30/sq ft
-
Textured paints: Add visual interest, hide minor surface cracks, ₹35–₹45/sq ft
-
Heat-reflective paints: Reduce heat absorption (surface temperature drops by 10-15°F), ₹45–₹60/sq ft
Pro Tip: Always use a weatherproof primer before paint. This prevents moisture damage and makes the paint last 30-40% longer.
Stone Cladding
Overview: Adds a premium, natural look.
Cost: ₹180–₹350/sq ft (including material + labour)
Types:
-
Kota stone: ₹180–₹250/sq ft, earthy tones, good durability
-
Kadappa stone: ₹220–₹280/sq ft, dark grey/black, elegant
-
Sandstone: ₹250–₹350/sq ft, warm colours, good for accent walls
Application:
-
Use stone cladding on one element: a single pillar, the entrance surround, or the balcony base.
-
Covering an entire wall in stone is costly and can make a small house feel closed in.
Wood-Finish Panels
Overview: Brings warmth to modern homes.
Cost: ₹350–₹600/sq ft (laminate) or ₹600–₹1,200/sq ft (solid wood)
Types:
-
Wood-finish laminates: Affordable, durable, available in many shades – from teak to walnut.
-
Solid teak: Premium, natural grain, ages beautifully – but requires annual oiling.
Application:
-
Entrance door
-
Balcony soffit (ceiling under the projection)
-
A 3-4 ft wide accent panel on the façade
Exterior Tiles
Overview: Durable and available in many designs.
Cost: ₹65–₹150/sq ft
Types:
-
Vitrified tiles: ₹65–₹120/sq ft, good for walls, available in wood/stone patterns.
-
Porcelain tiles: ₹120–₹180/sq ft, more durable, frost-resistant.
-
Terracotta tiles: ₹80–₹130/sq ft, warm, earthy, traditional look.
Glass
Overview: Essential for modern elevations.
Cost: ₹80–₹180/sq ft
Types:
-
Clear glass: ₹80–₹100/sq ft, maximum light.
-
Tinted glass: ₹100–₹130/sq ft, reduces glare and heat.
-
Frosted glass: ₹130–₹180/sq ft, for privacy (good for entrances and bathrooms).
Application:
-
Windows
-
Balcony railings (with stainless steel posts)
-
Entrance door panels
Metal
Overview: Adds a modern, industrial touch.
Cost: ₹200–₹500/sq ft (depending on type)
Types:
-
Aluminium: Lightweight, rust-resistant, powder-coated in any colour. Good for window frames.
-
Stainless steel: Premium, used for railings and gates.
-
Mild steel: Cheaper, but requires painting to prevent rust.
Textured Plaster
Overview: Creates a subtle, visually interesting finish.
Cost: ₹35–₹55/sq ft
Benefits:
-
Hides minor wall imperfections
-
Adds a natural, earthy appearance
-
More durable than smooth paint
How to Combine Materials Without Making the Elevation Look Busy
The key is restraint. Use the 60-30-10 Rule:
| Percentage | Material | Example |
|---|---|---|
| 60% | Primary material | Smooth or textured plaster (base colour) |
| 30% | Secondary material | Wood-finish panels or stone cladding |
| 10% | Accent material | Glass railing or metal trim |
Do’s and Don’ts:
-
✅ Do: Use a maximum of 3 materials on the façade.
-
✅ Do: Keep the secondary and accent materials visually related (e.g., warm wood + warm stone).
-
❌ Don’t: Use materials with completely different textures next to each other (e.g., smooth metal next to rough stone).
-
❌ Don’t: Use 4+ materials – the façade will look chaotic.
Best Colour Combinations for Small House Front Elevation
Colour can transform the perception of your home’s size and style.
White + Grey
Effect: Clean, modern, makes the house appear larger.
Usage:
-
70% White (main wall)
-
20% Light Grey (window frames, balcony railings)
-
10% Dark Grey (entrance door, accent pillar)
Cream + Brown
Effect: Warm, inviting, traditional.
Usage:
-
70% Cream (main wall)
-
20% Brown (wood-finish door, window frames)
-
10% Beige (entrance canopy)
White + Wood
Effect: Contemporary and cozy.
Usage:
-
70% White (main wall)
-
20% Wood-finish (entrance door, balcony soffit)
-
10% Black (window frames, light fixtures)
Beige + Grey
Effect: Sophisticated, neutral.
Usage:
-
70% Beige (main wall)
-
20% Light Grey (window frames, pillars)
-
10% Charcoal (entrance door)
White + Charcoal
Effect: Bold, striking, modern.
Usage:
-
70% White (main wall)
-
20% Charcoal (balcony railing, accent wall)
-
10% Grey (window frames)
Grey + Stone
Effect: Natural, timeless, earthy.
Usage:
-
70% Grey (main wall)
-
20% Stone (cladding on a pillar or the entrance)
-
10% Wood (entrance door)
Where to Use Each Colour:
| Colour | Best Used On |
|---|---|
| Light shades (White, Cream, Beige) | Main walls – they reflect light and make the house appear larger |
| Medium shades (Grey, Brown, Wood) | Window frames, balcony railings, doors |
| Dark shades (Charcoal, Black) | Entrance door, accent pillars, light fixtures |
How to Make a Small House Front Elevation Look Bigger
Good design can visually expand a compact home. Here are proven architectural techniques.
1. Use Vertical Architectural Elements
Technique: Design elements that draw the eye upward.
Examples:
-
Vertical grooves or flutes on the wall (4 inches wide, spaced 3 ft apart)
-
Tall, narrow windows (3 ft wide × 6 ft tall)
-
A vertical accent strip of a different material
-
A single vertical pillar rising the full height of the building
Why It Works: Vertical lines create the illusion of height. When a building appears taller, it seems more spacious overall.
2. Keep the Colour Palette Limited
Technique: Use a maximum of 3 colours.
Examples:
-
One base colour for 70% of the wall
-
One accent colour for 20% (window frames, doors, railings)
-
One highlight colour for 10% (entrance door, a single pillar)
Why It Works: Too many colours make the facade look busy and cramped. A limited palette creates a clean, expansive appearance.
3. Use Large, Well-Proportioned Windows
Technique: Windows should be taller than they are wide.
Standard: 4 ft wide × 5 ft tall is a good proportion.
For small houses: 3.5 ft wide × 5.5 ft tall – slightly taller and narrower – creates a more elegant look.
Why It Works: Large windows bring light in, making the interior feel more spacious, and the exterior appears more open and less solid.
4. Create One Strong Focal Point
Technique: One element should dominate the design.
Examples:
-
A grand entrance with a 5-ft wide door and a deep canopy
-
A feature wall with premium material (stone or wood)
-
A prominent balcony with glass railings
Why It Works: A single focal point organizes the entire design. Without one, the eye wanders and the house feels chaotic.
5. Use Glass Carefully
Technique: Use glass for railings and select window panels.
Examples:
-
Glass balcony railings instead of solid walls or metal bars
-
Fixed glass panels on either side of the entrance door
Why It Works: Glass is transparent, so it doesn’t block the view. This creates an illusion of openness.
6. Integrate the Balcony With the Façade
Technique: The balcony shouldn’t look like an afterthought.
Examples:
-
The balcony slab projects at the same time as the roof canopy – creating a unified projection
-
The balcony uses the same material and colour as the rest of the house
Why It Works: A well-integrated balcony adds depth, making the house look more architecturally sophisticated and larger.
7. Use Exterior Lighting
Technique: Proper lighting highlights design features.
Examples:
-
Uplights at the base of a vertical pillar
-
Wall-mounted lights on either side of the entrance
-
LED strip lights under the balcony slab
Why It Works: At night, a well-lit house looks grander and larger. Lighting draws attention to the design’s strengths.
8. Avoid Excessive Decoration
Technique: Keep it simple.
What to Avoid:
-
Decorative cornices and mouldings
-
Multiple window shapes (use a single shape throughout)
-
A mix of 3+ materials
-
Extra projections (canopies, balconies, overhangs)
Why It Works: Simplicity is elegance. A cluttered facade feels small and chaotic.
How to Design a Front Elevation for a Small House
Our professional design process ensures a cohesive and stunning result. This is the process we follow at SmartScale House Design.
Step 1: Analyze the Plot Dimensions
-
Measure the frontage, depth, and orientation
-
Note any setbacks required by local by-laws
-
Identify any easements or obstructions
-
Understand the relationship with neighbouring properties
Step 2: Study the Floor Plan
-
Identify the position of each room on the ground floor
-
Map where windows, doors, and the entrance are on the plan
-
Understand the internal flow – the entrance should align with the internal foyer
-
For G+1 homes, align the first-floor plan with the ground floor
Step 3: Identify Doors and Windows
-
Mark every window and door that appears on the front elevation
-
Assign a standard height: 7 ft for doors, 5 ft for windows
-
Ensure the sills (bottom of windows) are at a consistent height across the floor
Step 4: Plan Car Parking
-
Determine if parking is open, covered, or integrated
-
Size: 9 ft wide × 18 ft deep for sedans, 9.5 ft × 20 ft for SUVs
-
The garage door (if used) should align with the overall design
Step 5: Select the Architectural Style
-
Choose modern, contemporary, traditional, minimalist, etc.
-
This decision affects materials, colours, and every design element
Step 6: Establish the Façade Proportions
-
Use the 60-30-10 rule for materials
-
For G+1, the ground floor and first floor should be visually balanced. A 50-50 split is standard.
-
Window-to-wall ratio: 25-35% for most homes, 40% for north-facing homes
Step 7: Select Materials
-
Choose a primary material (plaster/paint), secondary (wood/stone), and accent (glass/metal)
-
Consider durability, maintenance, and cost
-
Mock-up the combination to ensure visual harmony
Step 8: Select Exterior Colours
-
Choose a base, accent, and highlight colour
-
Test the colours in natural light (the colour looks different in morning vs. afternoon sun)
Step 9: Add Balcony, Canopy and Other Features
-
Add a balcony if the floor plan allows (requires structural support)
-
Add a canopy above the entrance (minimum 3 ft deep)
-
Consider a canopy above the parking area if covered parking is planned
Step 10: Add Exterior Lighting
-
Plan lighting for the entrance (wall-mounted lights on both sides)
-
Add uplights for vertical pillars
-
Consider step lights for the path from the gate to the entrance
Step 11: Create the 3D Elevation
-
Use 3D modeling software to create a realistic view
-
Apply all materials and colours to the model
-
Add lighting to see the effect at night
Step 12: Review and Finalize
-
Present the 3D model to the homeowner
-
Make revisions based on feedback
-
Finalize the design
-
Create detailed construction drawings for the contractor
This is a professional workflow that ensures no element is overlooked and the final design is both beautiful and functional.
3D Front Elevation Design vs 2D Elevation
Understanding the difference is crucial for informed decision-making.
| Feature | 2D Elevation | 3D Elevation |
|---|---|---|
| Exterior proportions | ✓ | ✓ |
| Colours | Limited (often just lines on paper) | ✓ (realistic rendering) |
| Materials | Limited (texture is imagined) | ✓ (realistic texture) |
| Realistic appearance | No – it’s a technical drawing | Yes – it looks like a photograph |
| Lighting visualization | No | ✓ (day and night views) |
| Easy for homeowners to understand | Moderate (requires some imagination) | High (anyone can see the final look) |
| Material comparison | Limited (can’t see material combinations) | ✓ (can toggle between materials) |
| Construction errors | Can be missed (e.g., misaligned windows) | Easier to spot and correct |
| Time to create | 1-2 days | 3-5 days |
| Cost | Lower (₹5,000–₹10,000) | Higher (₹15,000–₹35,000) |
Why 3D Elevation is Worth the Investment:
-
Error Prevention: A 3D elevation can show a misaligned window, a colour mismatch, or a design flaw before construction starts. Fixing a mistake in the design phase costs ₹0. Fixing it during construction costs ₹50,000–₹2,00,000.
-
Peace of Mind: Homeowners know exactly what their house will look like. There are no “surprises” when the paint is applied.
-
Material Selection: You can see how stone, wood, glass, and paint look together. This reduces the risk of costly material mistakes.
-
Contractor Communication: A 3D elevation is far easier for a contractor to understand, leading to fewer errors and a faster construction timeline.
How Much Does a Small House Front Elevation Cost?
The final cost depends on several factors: the façade area, material selection, labour rates, number of floors, and level of detailing.
Cost Breakdown
| Component | Cost Estimate (₹) | Notes |
|---|---|---|
| Design Cost | 15,000 – 35,000 | For a 3D elevation with 2 revisions |
| Exterior Finish | 25 – 45 / sq ft | Paint + primer for 1,000 sq ft wall = ₹25,000–45,000 |
| Texture (if used) | 35 – 55 / sq ft | Adds ₹10,000–20,000 extra on a 1,000 sq ft wall |
| Stone Cladding | 180 – 350 / sq ft | For 100 sq ft accent wall = ₹18,000–35,000 |
| Tiles (if used) | 65 – 150 / sq ft | For 100 sq ft = ₹6,500–15,000 |
| Wood-Finish Material | 350 – 600 / sq ft | For 50 sq ft door + accent = ₹17,500–30,000 |
| Balcony Railing | 2,800 – 3,500 / ft | For 20 ft = ₹56,000–70,000 |
| Lighting (Exterior) | 15,000 – 35,000 | 4-6 wall lights, 2 uplights |
| Canopy (Entrance) | 18,000 – 25,000 | 3-ft deep, 8-ft wide canopy |
| Compound Wall | 1,200 – 1,800 / ft | For 50 ft = ₹60,000–90,000 |
| Gate | 25,000 – 50,000 | Steel or wooden gate |
| Total Estimate | ₹2.5 lakh – ₹4.5 lakh | For a typical 20×40 G+1 home |
Factors Affecting Cost
| Factor | Impact |
|---|---|
| Façade Area | Larger wall area = more paint, more material, higher cost |
| Material Selection | Stone cladding and wood finish cost 3-5× more than paint |
| Labour Rates | Urban areas are 20-30% higher than rural areas |
| Number of Floors | G+2 costs more than G+1 |
| Level of Detailing | More projections, more materials = higher design + construction cost |
Design Cost
-
2D Elevation: ₹5,000–₹10,000 (a single view, no colour)
-
3D Elevation (Basic): ₹15,000–₹20,000 (one view, basic materials)
-
3D Elevation (Premium): ₹25,000–₹35,000 (multiple views, day + night, material options)
CTA: Contact SmartScale House Design for a free initial quote. We’ll provide a detailed cost estimate for your specific project.
How to Choose the Right Front Elevation for Your Small House
Use this decision framework to guide your choice.
If your frontage is 15–20 ft
Choose minimalist or vertical designs. The key is to maximize perceived height.
-
Recommended styles: Minimalist, Modern, Simple
-
Key features: Vertical grooves, tall windows, minimal projections
-
Best designs from this page: #5 (Row House), #11 (20×60 Row House)
If your frontage is 20–25 ft
Consider modern box-style or G+1 elevations. You have room for a balcony and an entrance canopy.
-
Recommended styles: Modern, Contemporary
-
Key features: 4-ft balcony, entrance canopy, parking integration
-
Best designs from this page: #1 (20×40 Modern), #4 (20×40 G+1), #6 (20×50 Modern)
If your frontage is 25–30 ft
You can introduce wider balconies, porches, and feature walls.
-
Recommended styles: Contemporary, Duplex
-
Key features: 16-ft wide balcony, 2-car parking, prominent entrance
-
Best designs from this page: #12 (25×40 Modern), #14 (30×35 Bungalow)
If you need parking
Design the parking before finalizing the façade.
-
Recommended options: Covered parking under balcony, integrated parking with folding shutter
-
Best designs from this page: #8 (20×50 with Parking), #15 (30×35 with Parking)
If you want low maintenance
Use fewer materials and simpler forms.
-
Recommended options: Smooth plaster with paint, simple window design, no projections
-
Materials to avoid: Wood finish (needs annual maintenance), stone cladding (needs cleaning)
If you want a premium appearance
Invest in one or two high-impact materials instead of decorating everything.
-
Recommended options: Wood-finish entrance door + stone-clad pillar
-
Design approach: Use premium materials sparingly. A single stone pillar is more impressive than a stone-clad wall.
Common Small House Front Elevation Mistakes
Avoid these errors for a better result.
Mistake 1: Copying a Design Without Considering the Floor Plan
-
The Problem: A beautiful elevation might have windows where your floor plan has a bathroom wall.
-
The Solution: Always design the elevation based on your specific floor plan. The two must align.
Mistake 2: Using Too Many Materials
-
The Problem: A mix of stone, wood, metal, tiles, and paint in 5+ colours looks chaotic.
-
The Solution: Use the 60-30-10 rule – 3 materials maximum.
Mistake 3: Oversized Columns
-
The Problem: Columns that are too thick (18″×18″ on a 20-ft wide house) dominate the design and block light.
-
The Solution: Use 9″×9″ columns for a 2-story house. If you need wider columns for structural reasons, make them aesthetically pleasing with cladding.
Mistake 4: Poor Window Alignment
-
The Problem: Windows on the first floor are in different positions than windows on the ground floor. This looks chaotic and structurally complex.
-
The Solution: Align windows vertically. If the floor plan changes, plan for a structural beam that allows the window to be in a different position.
Mistake 5: Ignoring Parking
-
The Problem: The design is finalized, and then the homeowner remembers they need car parking. The parking is then an afterthought, an ugly add-on.
-
The Solution: Design the parking first. It’s a major element that affects the entire façade.
Mistake 6: Excessive Façade Projections
-
The Problem: A balcony projects 6 ft, an entrance canopy projects 4 ft, a window sill projects 1 ft. The façade looks like it has “growths.”
-
The Solution: Limit projections. One 4-ft projection is enough for most small houses.
Mistake 7: Choosing Colours Without Considering Natural Light
-
The Problem: A dark grey colour that looks beautiful in a showroom looks like a dark cave on a north-facing house.
-
The Solution: Test your colours on the actual wall, in the actual light conditions. North-facing needs lighter colours, south-facing can handle darker ones.
Mistake 8: Designing Only for Daytime Appearance
-
The Problem: The house looks great in the day, but at night, it’s a dark, lifeless block.
-
The Solution: Plan exterior lighting at the design stage. Wall lights, uplights, and step lights transform a night-time appearance.
Mistake 9: Ignoring Maintenance
-
The Problem: Wooden doors, stone cladding, and glass railings all require maintenance. The homeowner wasn’t prepared for this.
-
The Solution: Discuss maintenance requirements during the design phase. If the homeowner wants low maintenance, use paint and metal railings instead of wood and glass.
Mistake 10: Prioritizing Appearance Over Functionality
-
The Problem: A beautiful design has no shade for the entrance, so when it rains, the entrance gets wet.
-
The Solution: Always design for function. A canopy above the entrance, a proper garage door, and well-placed windows are functional priorities.
Vastu Considerations for Small House Front Elevation
For those who follow Vastu principles, these points are practical to consider.
House Orientation
-
North-facing: The sun is never directly on the north face, so the house stays cooler. Vastu recommends this orientation for prosperity.
-
South-facing: The afternoon sun hits the south face. Vastu often discourages this but with proper shading, it can work.
-
East-facing: The morning sun is considered auspicious. Vastu strongly recommends east-facing homes.
-
West-facing: The evening sun is harsh. Vastu often advises against it, but it can be managed with shading.
Entrance
-
Vastu recommends the main entrance be in the north, east, or north-east.
-
The entrance should be well-proportioned (4-5 ft wide) and prominent.
-
Avoid placing the entrance directly opposite the main road.
Door Position
-
The main door should be the tallest and widest door in the house.
-
It should open inwards.
-
Avoid a door that’s directly in line with the back door.
Windows
-
Vastu recommends windows on all sides for cross-ventilation.
-
Windows should be aligned to maximise natural light and air flow.
Balcony
-
A balcony is recommended to bring in light and air.
-
The balcony should project outward, not be enclosed.
Natural Light and Ventilation
-
These are fundamental to a healthy, Vastu-friendly home.
-
Ensure every room has at least one window for cross-ventilation.
Important Note
Vastu is a set of traditional principles, not building regulations. Local by-laws, structural requirements, and site constraints take precedence. Vastu preferences should always be coordinated with architectural, structural, and local building requirements.
Small House Front Elevation Design for Different Requirements
Front Elevation for a Small Family House
-
Focus: Warmth, functionality, and a welcoming entrance.
-
Key Features: A porch for seating, a clear entrance, well-proportioned windows.
-
Style: Traditional or Simple Modern.
-
Budget: ₹1.5–₹3 lakhs for the exterior finish.
Front Elevation for a Rental House
-
Focus: Low maintenance, durability, and broad appeal.
-
Key Features: Minimal projections, standard materials (paint, not wood or stone).
-
Style: Simple, clean, no strong personality.
-
Budget: ₹80,000–₹1.5 lakhs for the exterior finish.
Front Elevation for a Narrow Plot
-
Focus: Vertical lines to maximize perceived height.
-
Key Features: Tall windows, vertical grooves, a single strong focal point.
-
Style: Minimalist or Modern.
-
Budget: ₹1.5–₹2.5 lakhs for the exterior finish.
Front Elevation for a Corner Plot
-
Focus: A double-frontage design that makes the house a landmark.
-
Key Features: Both the front and side facades are designed. The entrance is often on one side, and windows on the other.
-
Style: Contemporary.
-
Budget: ₹3–₹5 lakhs for the exterior finish (two facades).
Front Elevation With Car Parking
-
Focus: Seamless integration of the garage door into the design.
-
Key Features: A folding shutter painted to match the wall, a canopy above the parking area.
-
Style: Modern or Contemporary.
-
Budget: ₹1.2–₹1.5 lakhs extra for the parking structure.
Front Elevation With Balcony
-
Focus: A well-designed balcony that adds depth and character.
-
Key Features: 4-ft deep projection, glass railing, wood-finish soffit.
-
Style: Modern or Contemporary.
-
Budget: ₹55,000–₹75,000 extra for the balcony.
Front Elevation for a Low-Budget House
-
Focus: Maximum impact from minimal spend.
-
Key Features: Excellent paint job, one strong focal point (a well-designed entrance), simple forms.
-
Style: Simple Modern.
-
Budget: ₹80,000–₹1.2 lakhs for the exterior finish.
Front Elevation for a Modern Villa
-
Focus: Premium materials, large glass spans, contemporary forms.
-
Key Features: Extensive use of glass, stone, wood finish, and metal. Multiple projections and a grand entrance.
-
Style: Contemporary or Luxury Modern.
-
Budget: ₹5–₹10 lakhs for the exterior finish.
Why Choose SmartScale House Design for Your Small House Elevation?
SmartScale House Design offers a unique, professional, and convenient service.
-
Online Design Service: We work remotely. No site visits are needed for the design phase. You share your plot details and floor plan, we do the rest.
-
Customized Designs: Every design is created for your specific plot and floor plan. We don’t sell “off-the-shelf” designs.
-
Plot-Specific Elevation: The design respects your plot’s dimensions, orientation, and local by-laws.
-
3D Visualization: You see your home before it’s built. Realistic 3D renderings show materials, colours, and lighting.
-
Multiple Architectural Styles: We design in any style – Modern, Contemporary, Traditional, Minimalist, or a fusion.
-
Material and Colour Visualization: We show you how different materials and colour combinations will look on your home.
-
Remote Consultation: We work with you via video calls, email, and WhatsApp. You’re involved in every decision.
-
Residential Design Experience: We have designed 100+ homes across India. We understand local challenges, budgets, and preferences.
Our Small House Front Elevation Design Process
Our process is simple, transparent, and fast.
-
Share Plot Details: Fill out our form with your plot size, frontage, orientation, and any local by-laws.
-
Share Floor Plan: Upload your floor plan (sketch, AutoCAD, or even a photo of a hand-drawn plan).
-
Discuss Style: We’ll have a call to understand your style, budget, and preferences.
-
Develop 3D Elevation: Our team creates a 3D elevation model.
-
Review: We present the model to you for feedback.
-
Revise: We make revisions based on your feedback (2 revisions included).
-
Finalize: We deliver the final 3D model + 2D drawings and a material list.
Timeline: 5-10 working days for a single home.
Get a Customized Front Elevation Design for Your Small House
Have a 20×40, 20×50, 25×40, 30×35, or another compact plot? Share your plot dimensions and floor plan with SmartScale House Design and get a customized 3D front elevation designed around your home.
Visualize your dream home before you build it. Our expert team will work with you to create a stunning, functional, and budget-friendly elevation that perfectly complements your lifestyle.
Why Wait?
-
Avoid costly construction mistakes
-
See your home in realistic 3D before building
-
Get a design that respects your plot and budget
-
Make confident decisions about materials and colours
Get Your 3D Front Elevation Design
Frequently Asked Questions About Small House Front Elevation
Which front elevation is best for a small house?
The best style prioritizes a clear focal point. Minimalist or contemporary lines often work well to avoid visual clutter. For a 20×40 plot, a modern G+1 design is excellent.
What is the best front elevation for a 20×40 house?
Modern or duplex designs are excellent for 20×40 plots. We recommend (Modern 20×40) or (20×40 G+1). These designs offer a perfect balance of style, functionality, and cost.
What is the best front elevation for a 20×50 house?
A G+1 or duplex design with a balcony and integrated parking is highly recommended. (20×50 G+1 with Balcony) and (20×50 with Car Parking) are excellent choices.
How can I make a small house look bigger?
Use vertical lines, a limited colour palette (2-3 colours), large windows (taller than wide), create a single strong focal point, and use glass carefully for railings and entrances.
Which colour is best for a small house front?
Lighter colours like white, beige, cream, or light grey are best for making a small house appear larger and brighter. Dark colours absorb light and can make the house look smaller. For a 20×40 house, we recommend White + Grey or White + Wood combinations.
Can I get a modern elevation for a small house?
Yes, absolutely. Modern design principles are especially effective for small houses, emphasizing clean lines, minimal decoration, and a simple material palette. Our Designs are modern designs.
Can I design an elevation from my floor plan?
Yes, a professional elevation design is always based on the floor plan to ensure the windows and doors are in the correct places. This is Step 2 of our process.
How much does a small house elevation cost?
The cost varies significantly based on materials, finishes, and design complexity. A typical 20×40 G+1 home exterior finish costs ₹2.5–₹4.5 lakhs. The design fee is ₹15,000–₹35,000 for a 3D elevation.
How much does a 3D elevation design cost?
A professional 3D elevation design service costs ₹15,000–₹35,000 depending on the detail level and the number of revisions.
Is 3D elevation necessary before construction?
It is highly recommended as it helps you visualize the final product, avoid costly errors (₹50,000–₹2,00,000 saved), and make informed decisions about materials and colours. It’s a small investment for significant peace of mind.
Can I include car parking in a small house elevation?
Yes, parking is a common and important feature. A good design integrates it seamlessly. (20×50 with Parking) and (30×35 with Parking) are excellent examples.
Which elevation is best for a narrow plot?
A minimalist or modern design that emphasizes vertical elements is ideal for narrow plots. (20×40 Row House) and Design #11 (20×60 Row House) are specifically designed for narrow plots.
Can Vastu be considered in elevation design?
Yes, Vastu principles can be incorporated into the design, particularly regarding the entrance, windows, and orientation. We discuss Vastu preferences during the design consultation.
How long does a 3D elevation design take?
Typically, the initial design and review process for a 3D elevation takes 5-10 working days, depending on the project’s complexity and the number of revisions.
Can a ready-made elevation be customized?
Yes, we can customize any of our 25+ designs to fit your specific plot size, floor plan, and personal preferences. We don’t sell “off-the-shelf” designs – every home is unique.